'Tis the season for tracking inventory! To make this process as efficient as possible for you, we've put together this guide to help you with all your inventory tracking needs. Please watch the following video, or read the content below for a step-by-step guide on tracking inventory from start to finish.
(There is also a PDF version of this guide attached to this page for your convenience.)
***IMPORTANT: Make sure you complete your inventory reset during off hours when the store is closed so customer so customers do not buy items during the process, which would cause a discrepancy between the inventory entered and the inventory on hand.
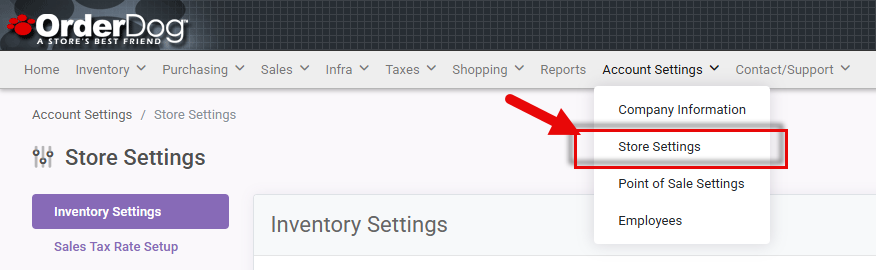
- Start on the OrderDog Portal. Hover over "Account Settings" and select "Store Settings".
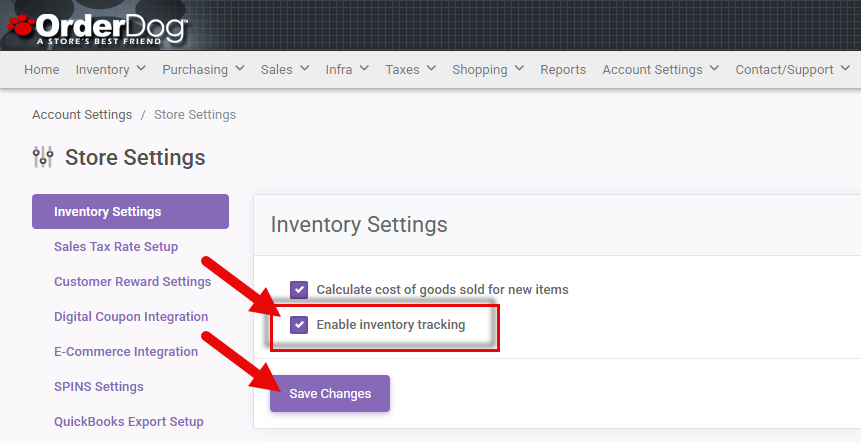
- If this is your first time tracking inventory, turn the inventory tracking option on. Scroll down and press “Save Changes”.
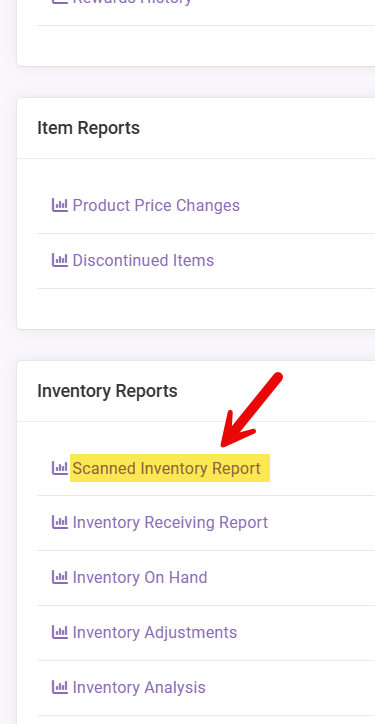
- Next, we’ll make our way over to “Reports”.
- Scroll down and select “Scanned Inventory Report”.
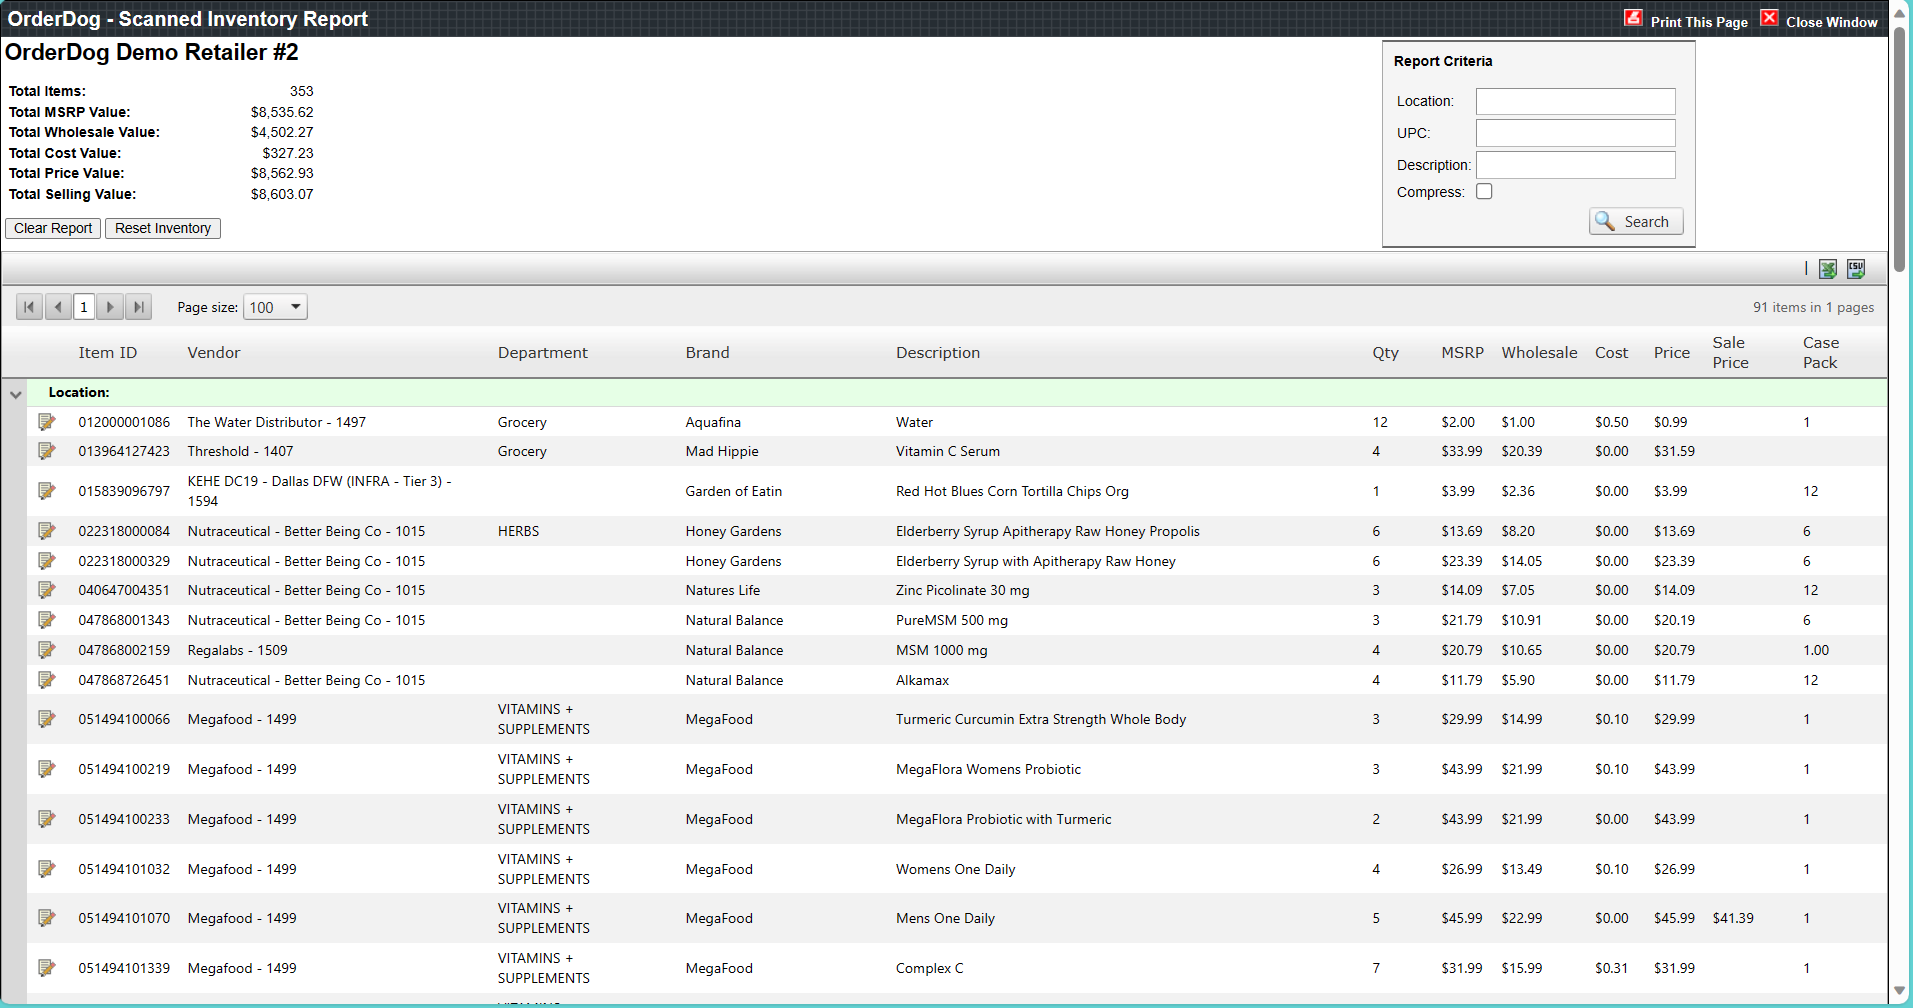
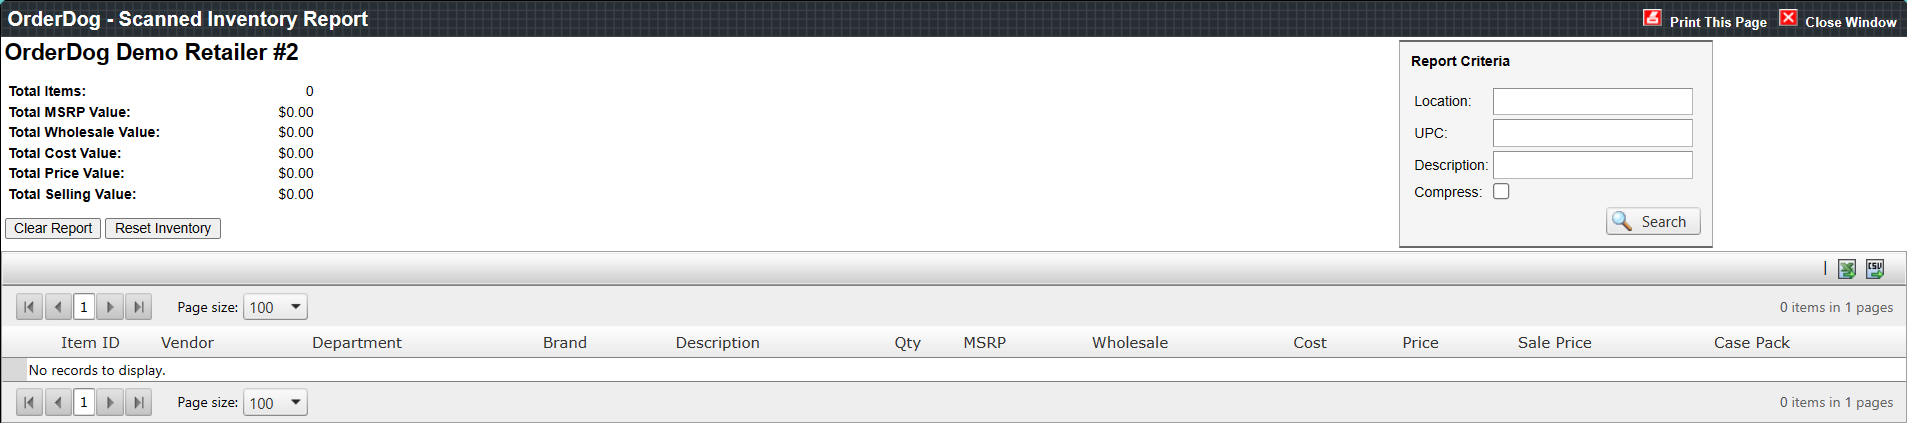
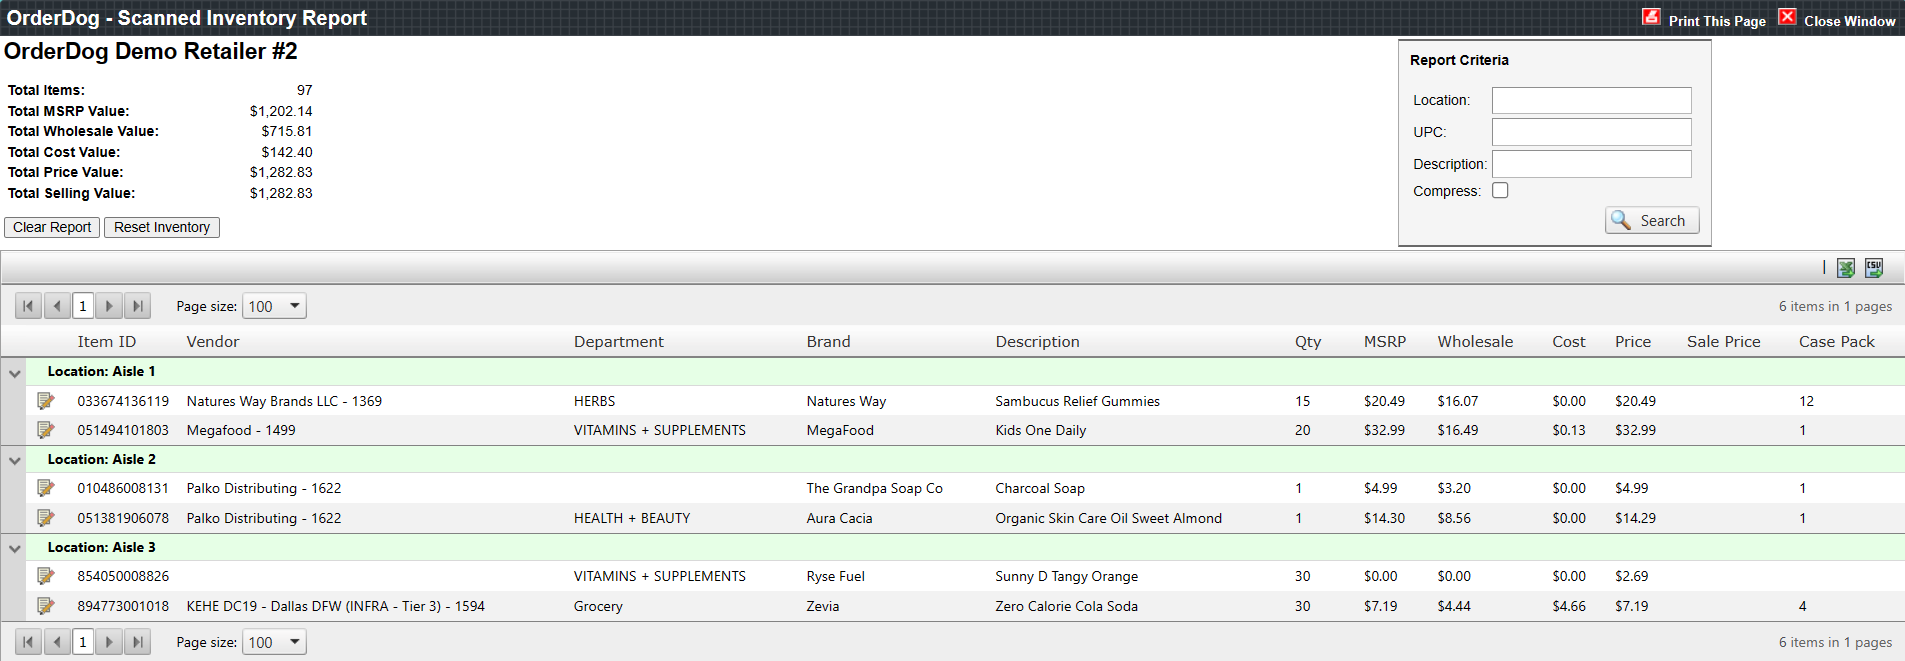
- This is the “Scanned Inventory Report” page.
- This is the “Scanned Inventory Report” page.
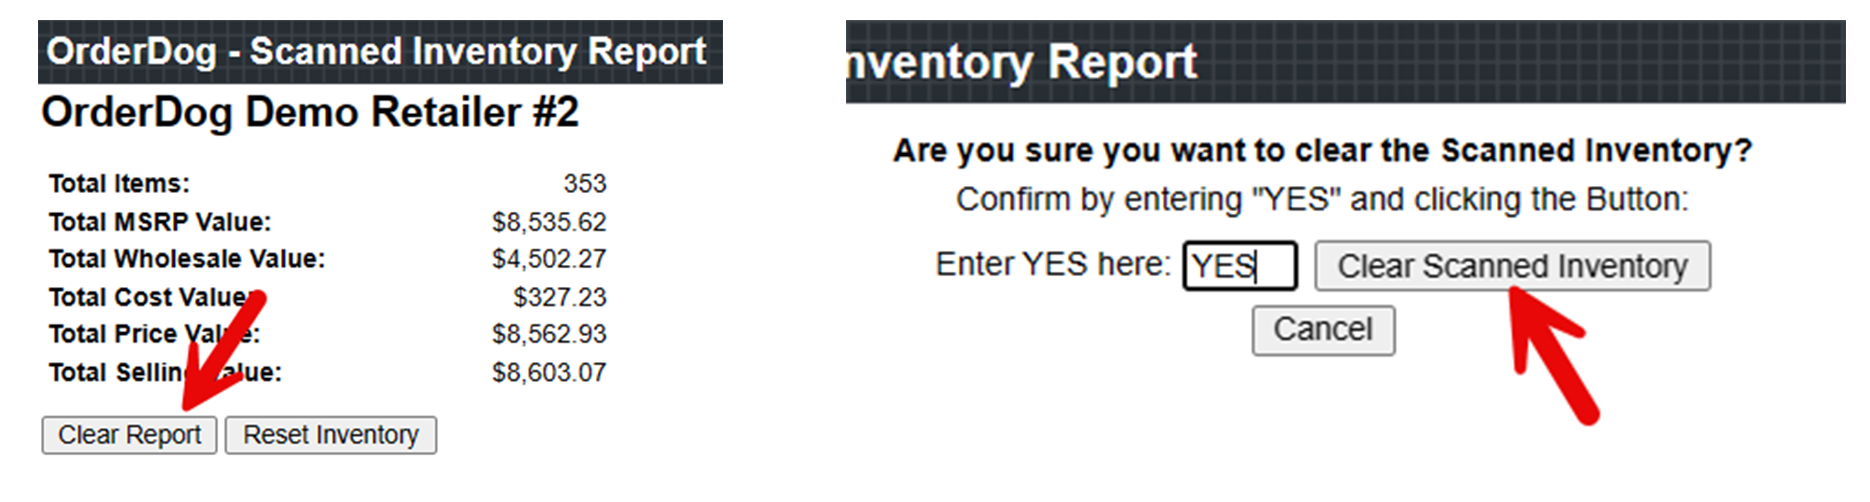
- Click “Clear Report”. Confirm you want to clear your current scanned inventory and type “YES” into the text box. Then click “Clear Scanned Inventory”.
- The “Scanned Inventory Report” page is now clear. Grab your mobile scanner to scan your current inventory.
- The “Scanned Inventory Report” page is now clear. Grab your mobile scanner to scan your current inventory.
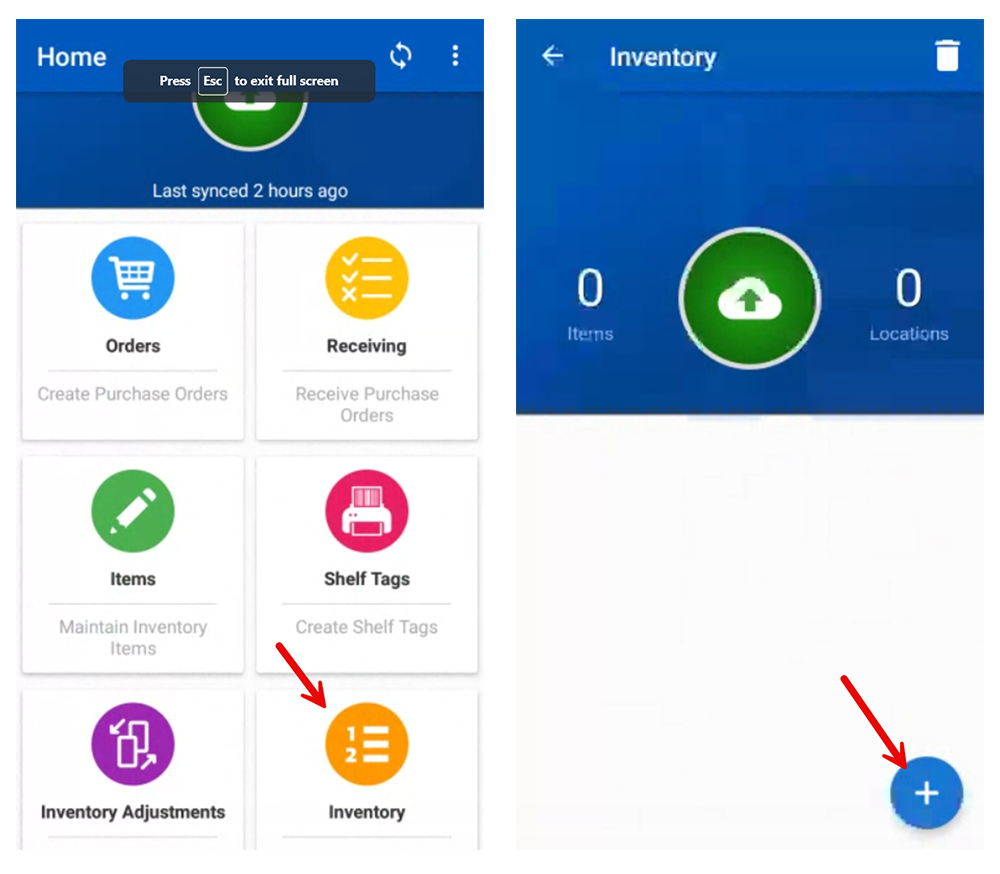
- On the mobile scanner home screen, tap “Inventory”. Select “+”.
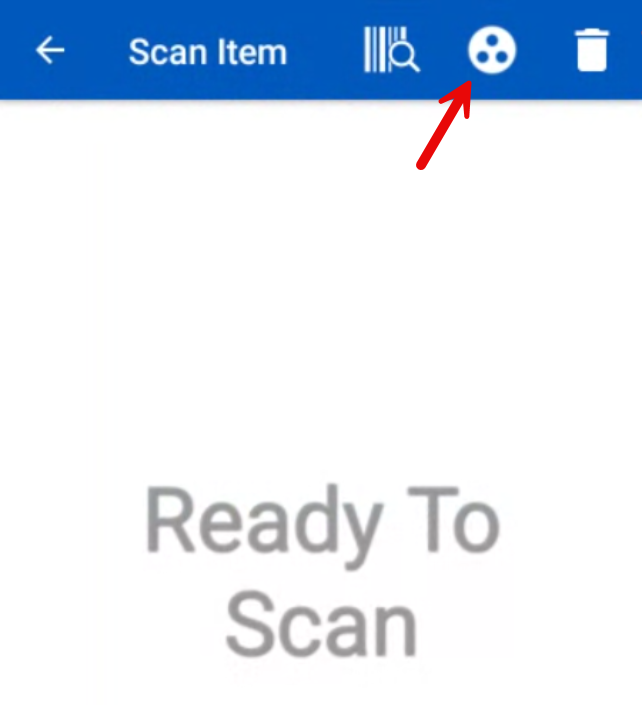
- Select the Location Grouping icon on the top right.
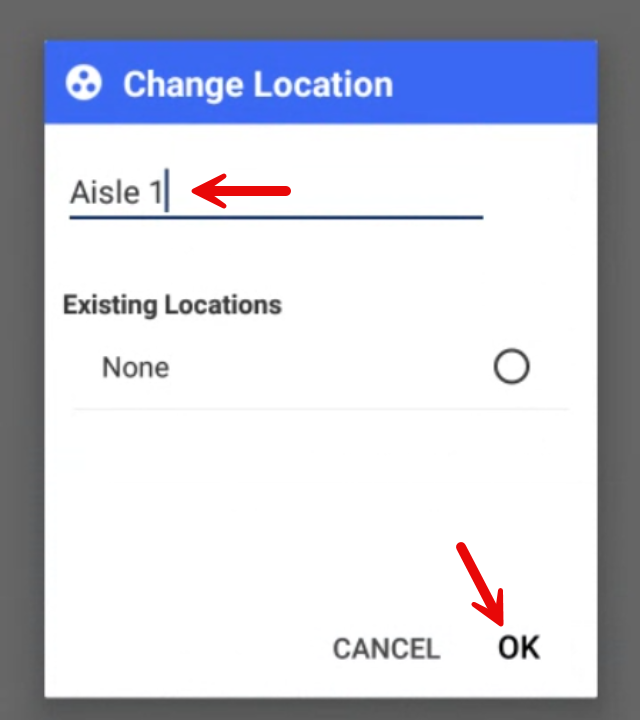
- Tap “New Location” to enter a group name. One way you may want to group the items is by aisle. Tap “OK”.
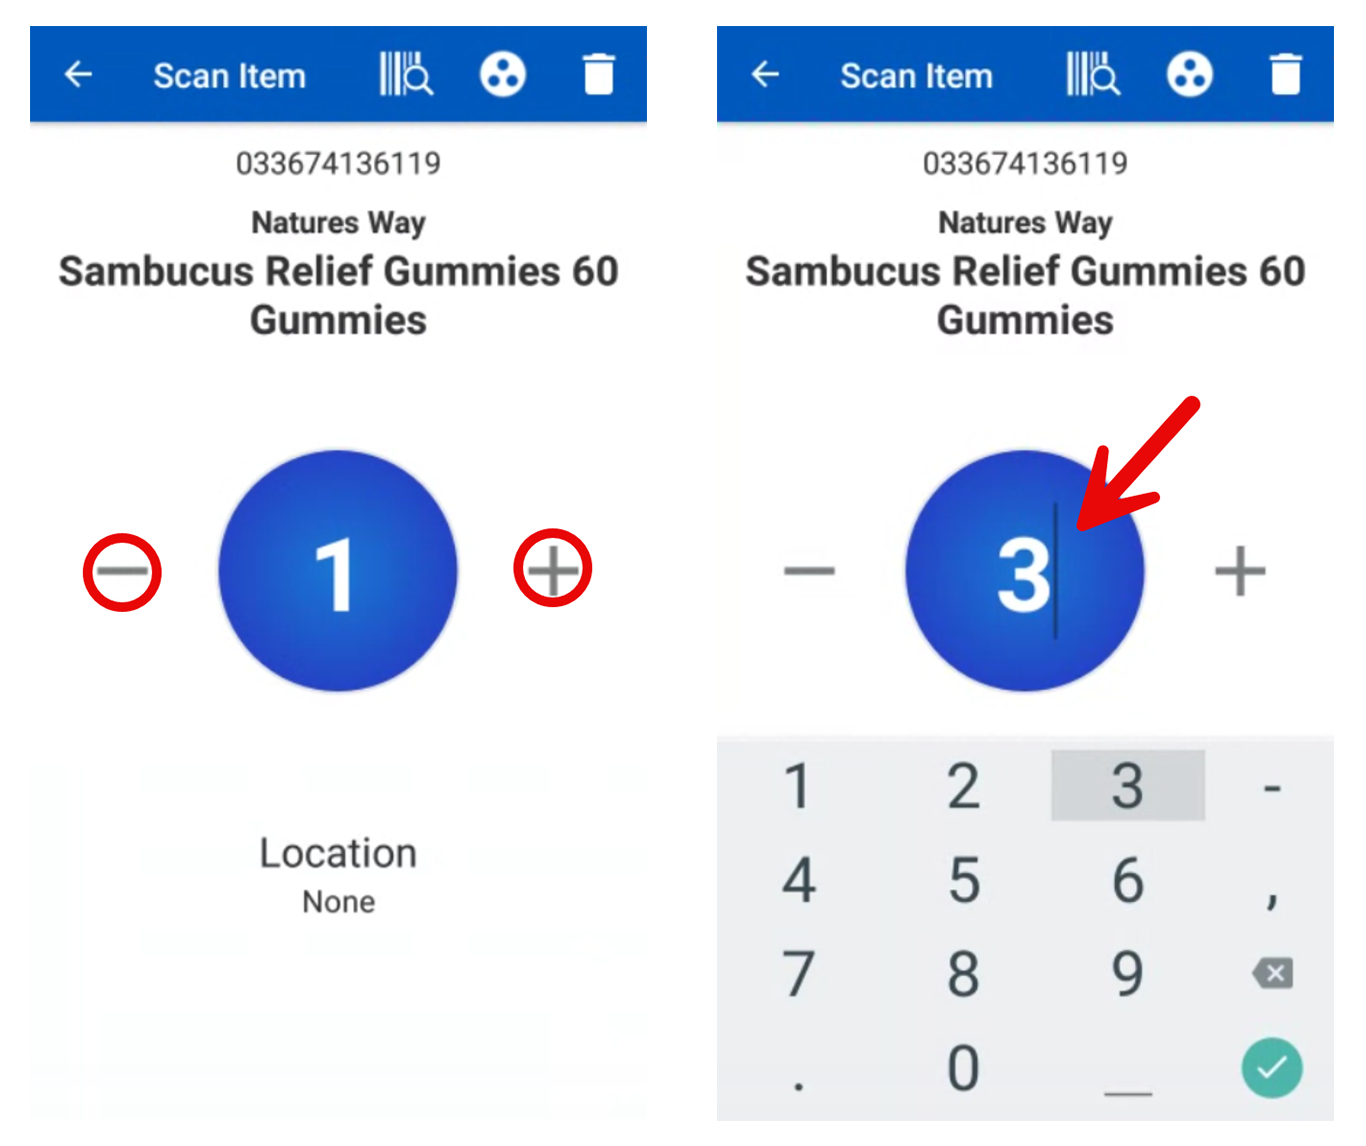
- Scan an item you want to be included in this group. Enter the quantity you have on hand. There are two ways to update the quantity:
- Select the “+” or “-“ buttons.
- Tap the blue oval and type in the quantity.
- When you have the quantity updated to match your current inventory, scan the next item. Enter the on-hand inventory quantity just like previously shown. Do so for the rest of the items in the Location Group you are sorting by.
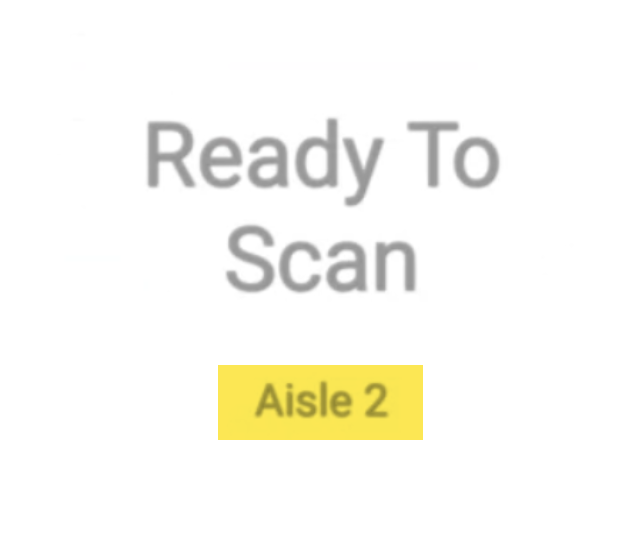
- To create another inventory group, simply tap the Location Grouping icon and make another group, just like before. Note how it displays the updated group that will apply to the items you scan.
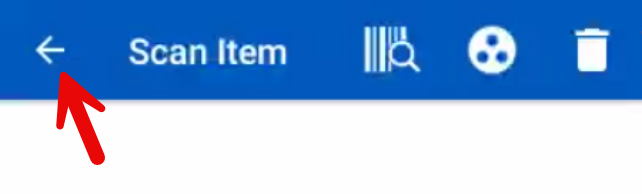
- Continue this process until all inventory has been scanned in and quantity entered. When you have completed taking inventory, select the back arrow.
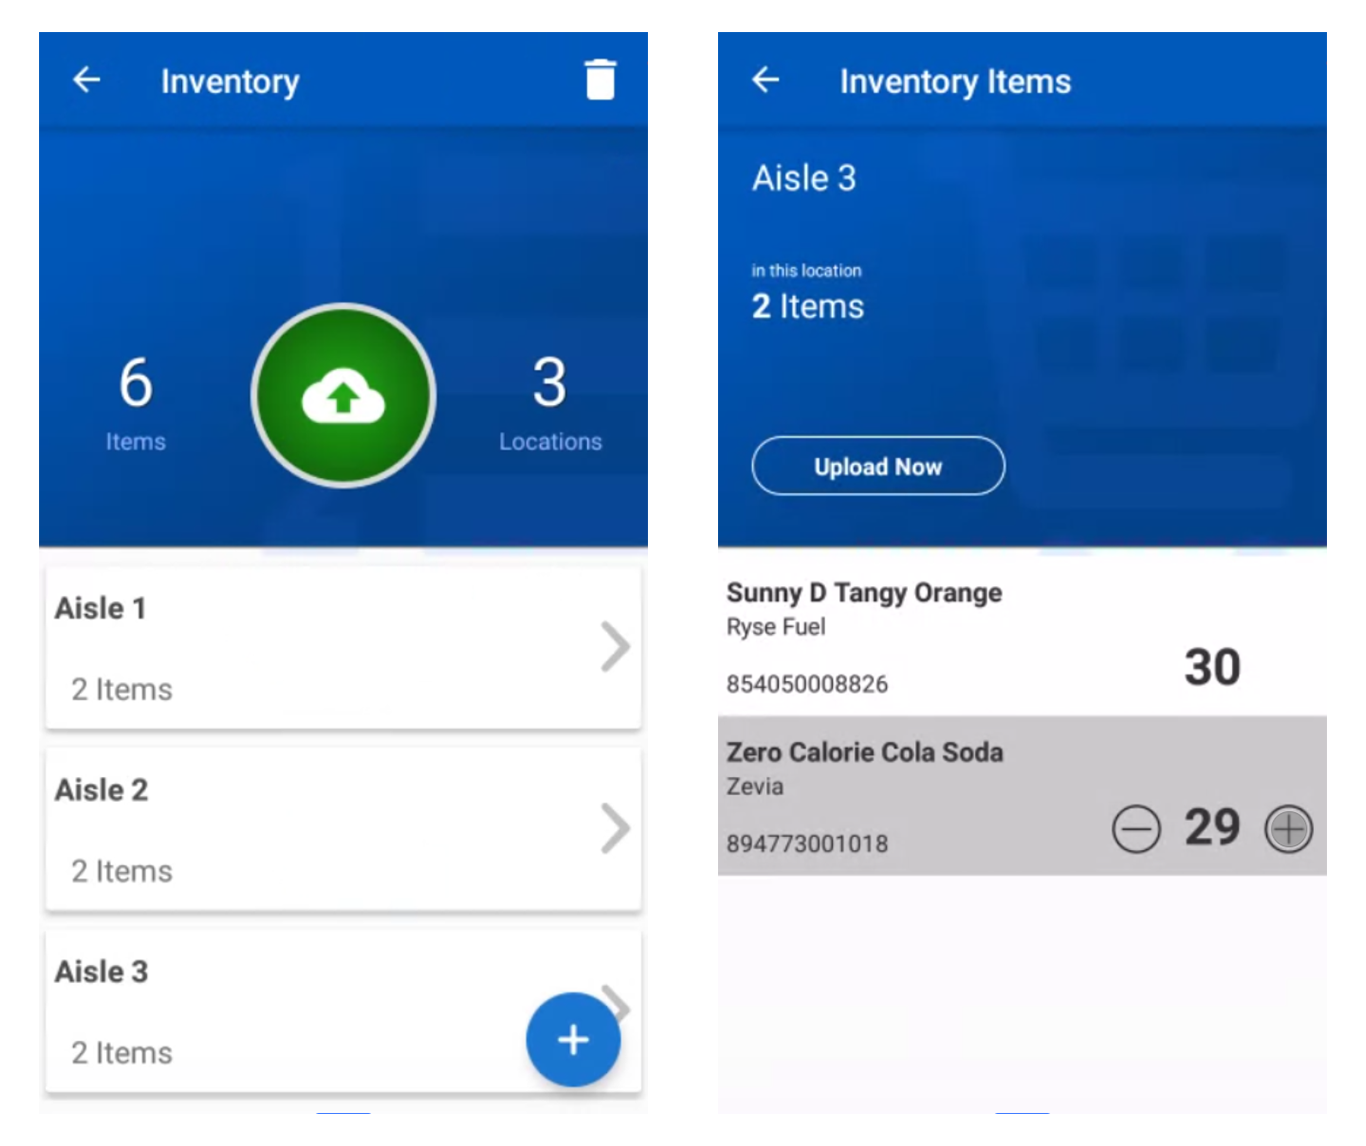
- On the inventory summary screen, you can review what you entered and make any edits necessary. You can correct the item quantity from here if needed.
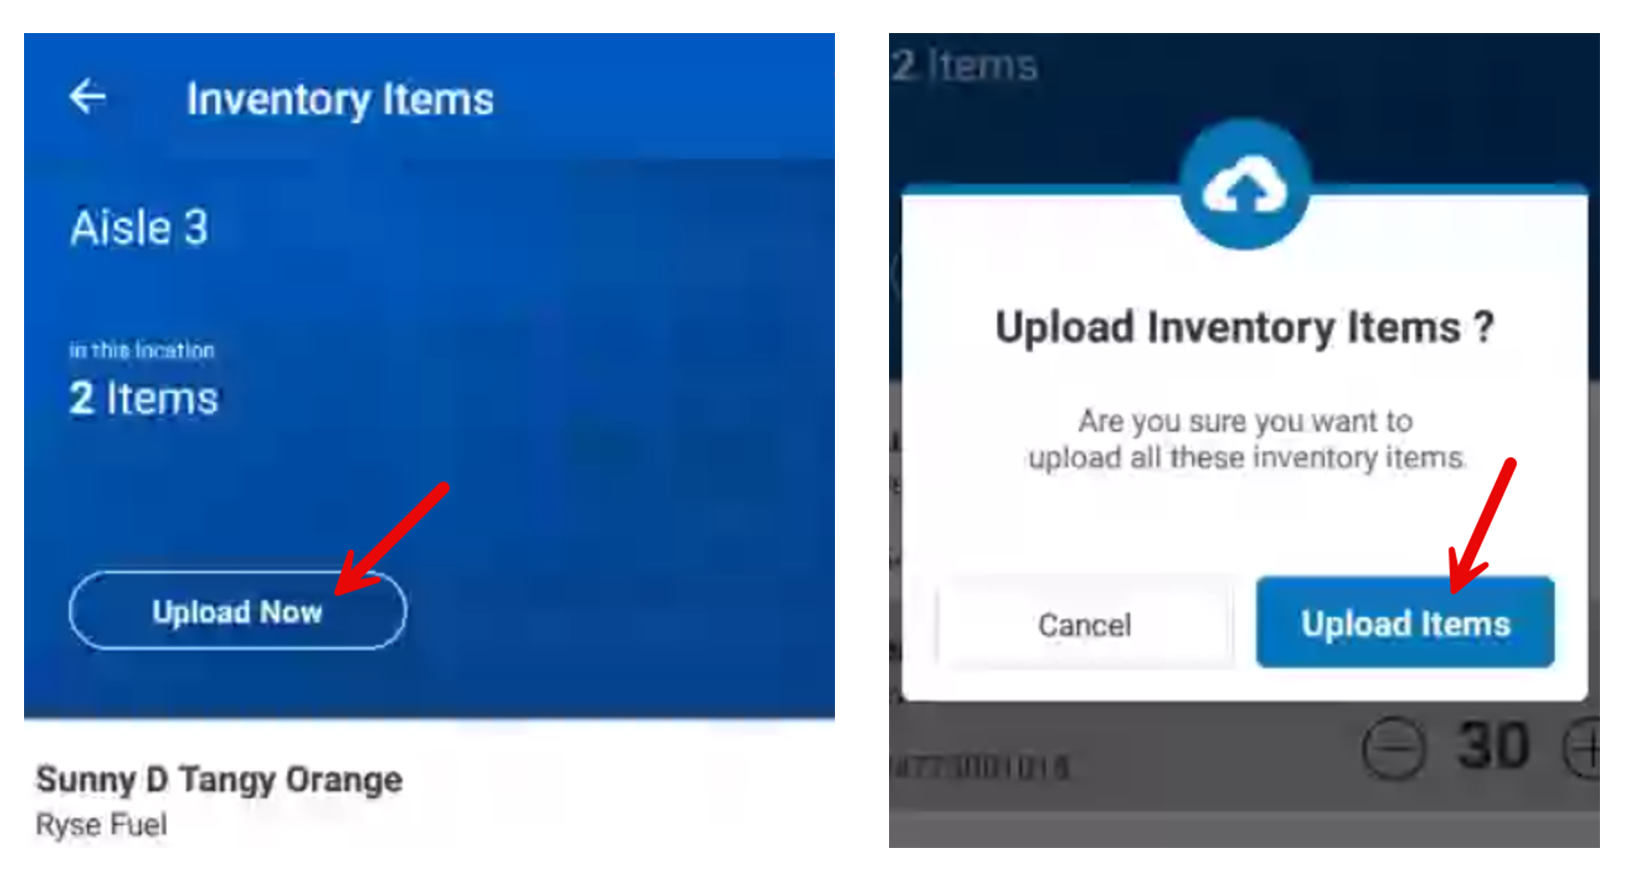
- If you want to upload a single location group, tap “Upload Now”, then “Upload Order”.
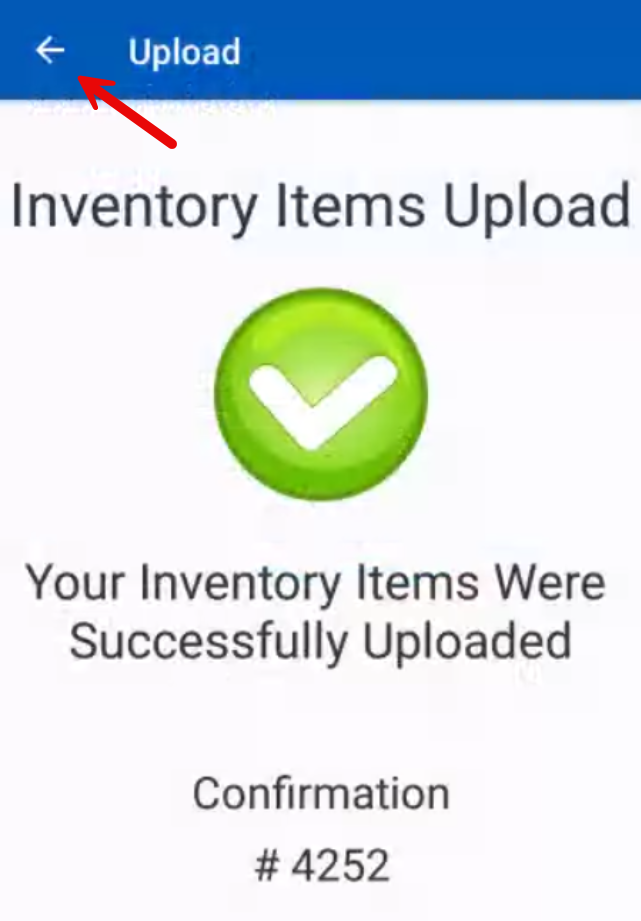
- Select the back arrow to return to the inventory summary screen.
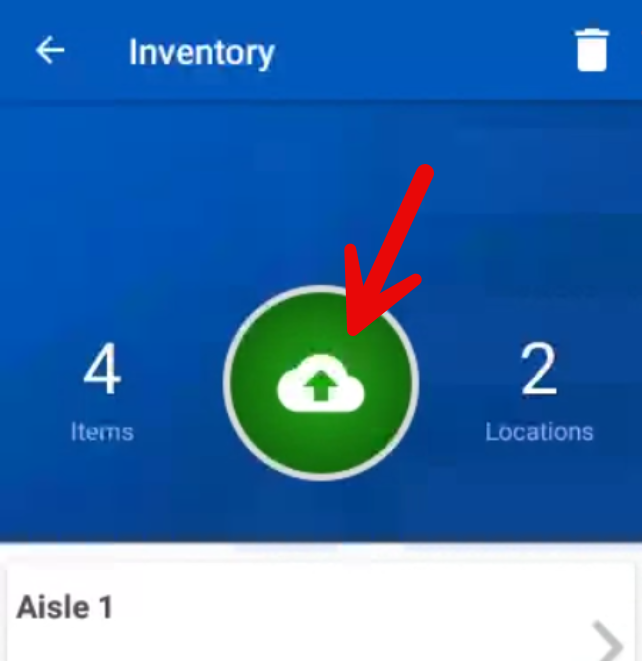
- When everything looks good, tap the green upload button to send the inventory records to the portal.
- Now return to the OrderDog portal and navigate back to the “Scanned Inventory Report” page. Refresh the page to populate the page with the updated inventory sent from the scanner.
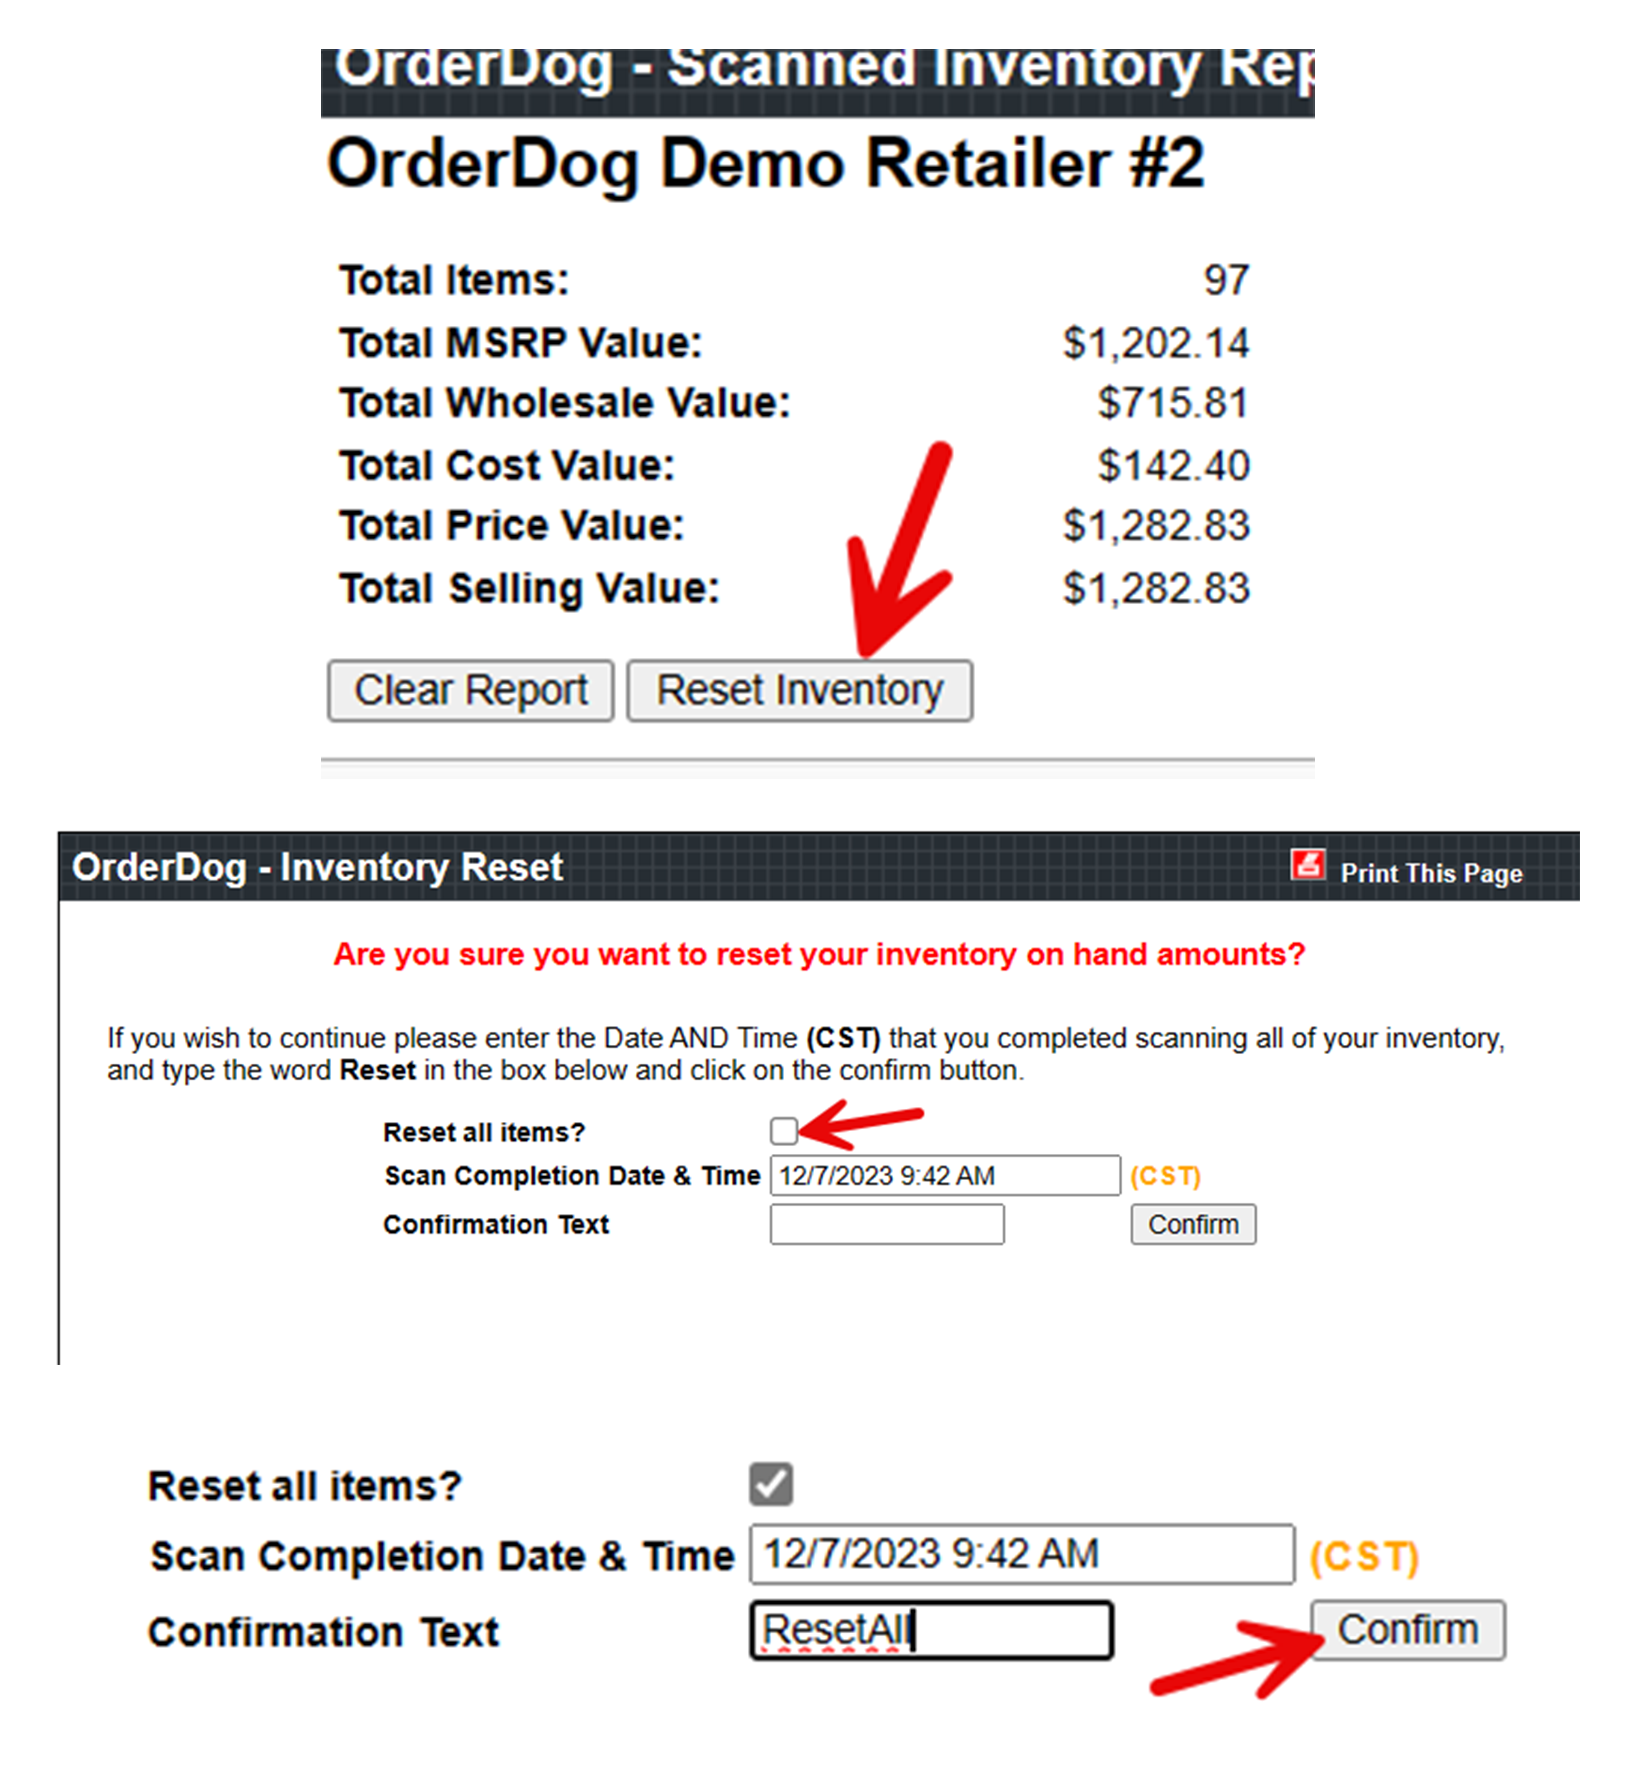
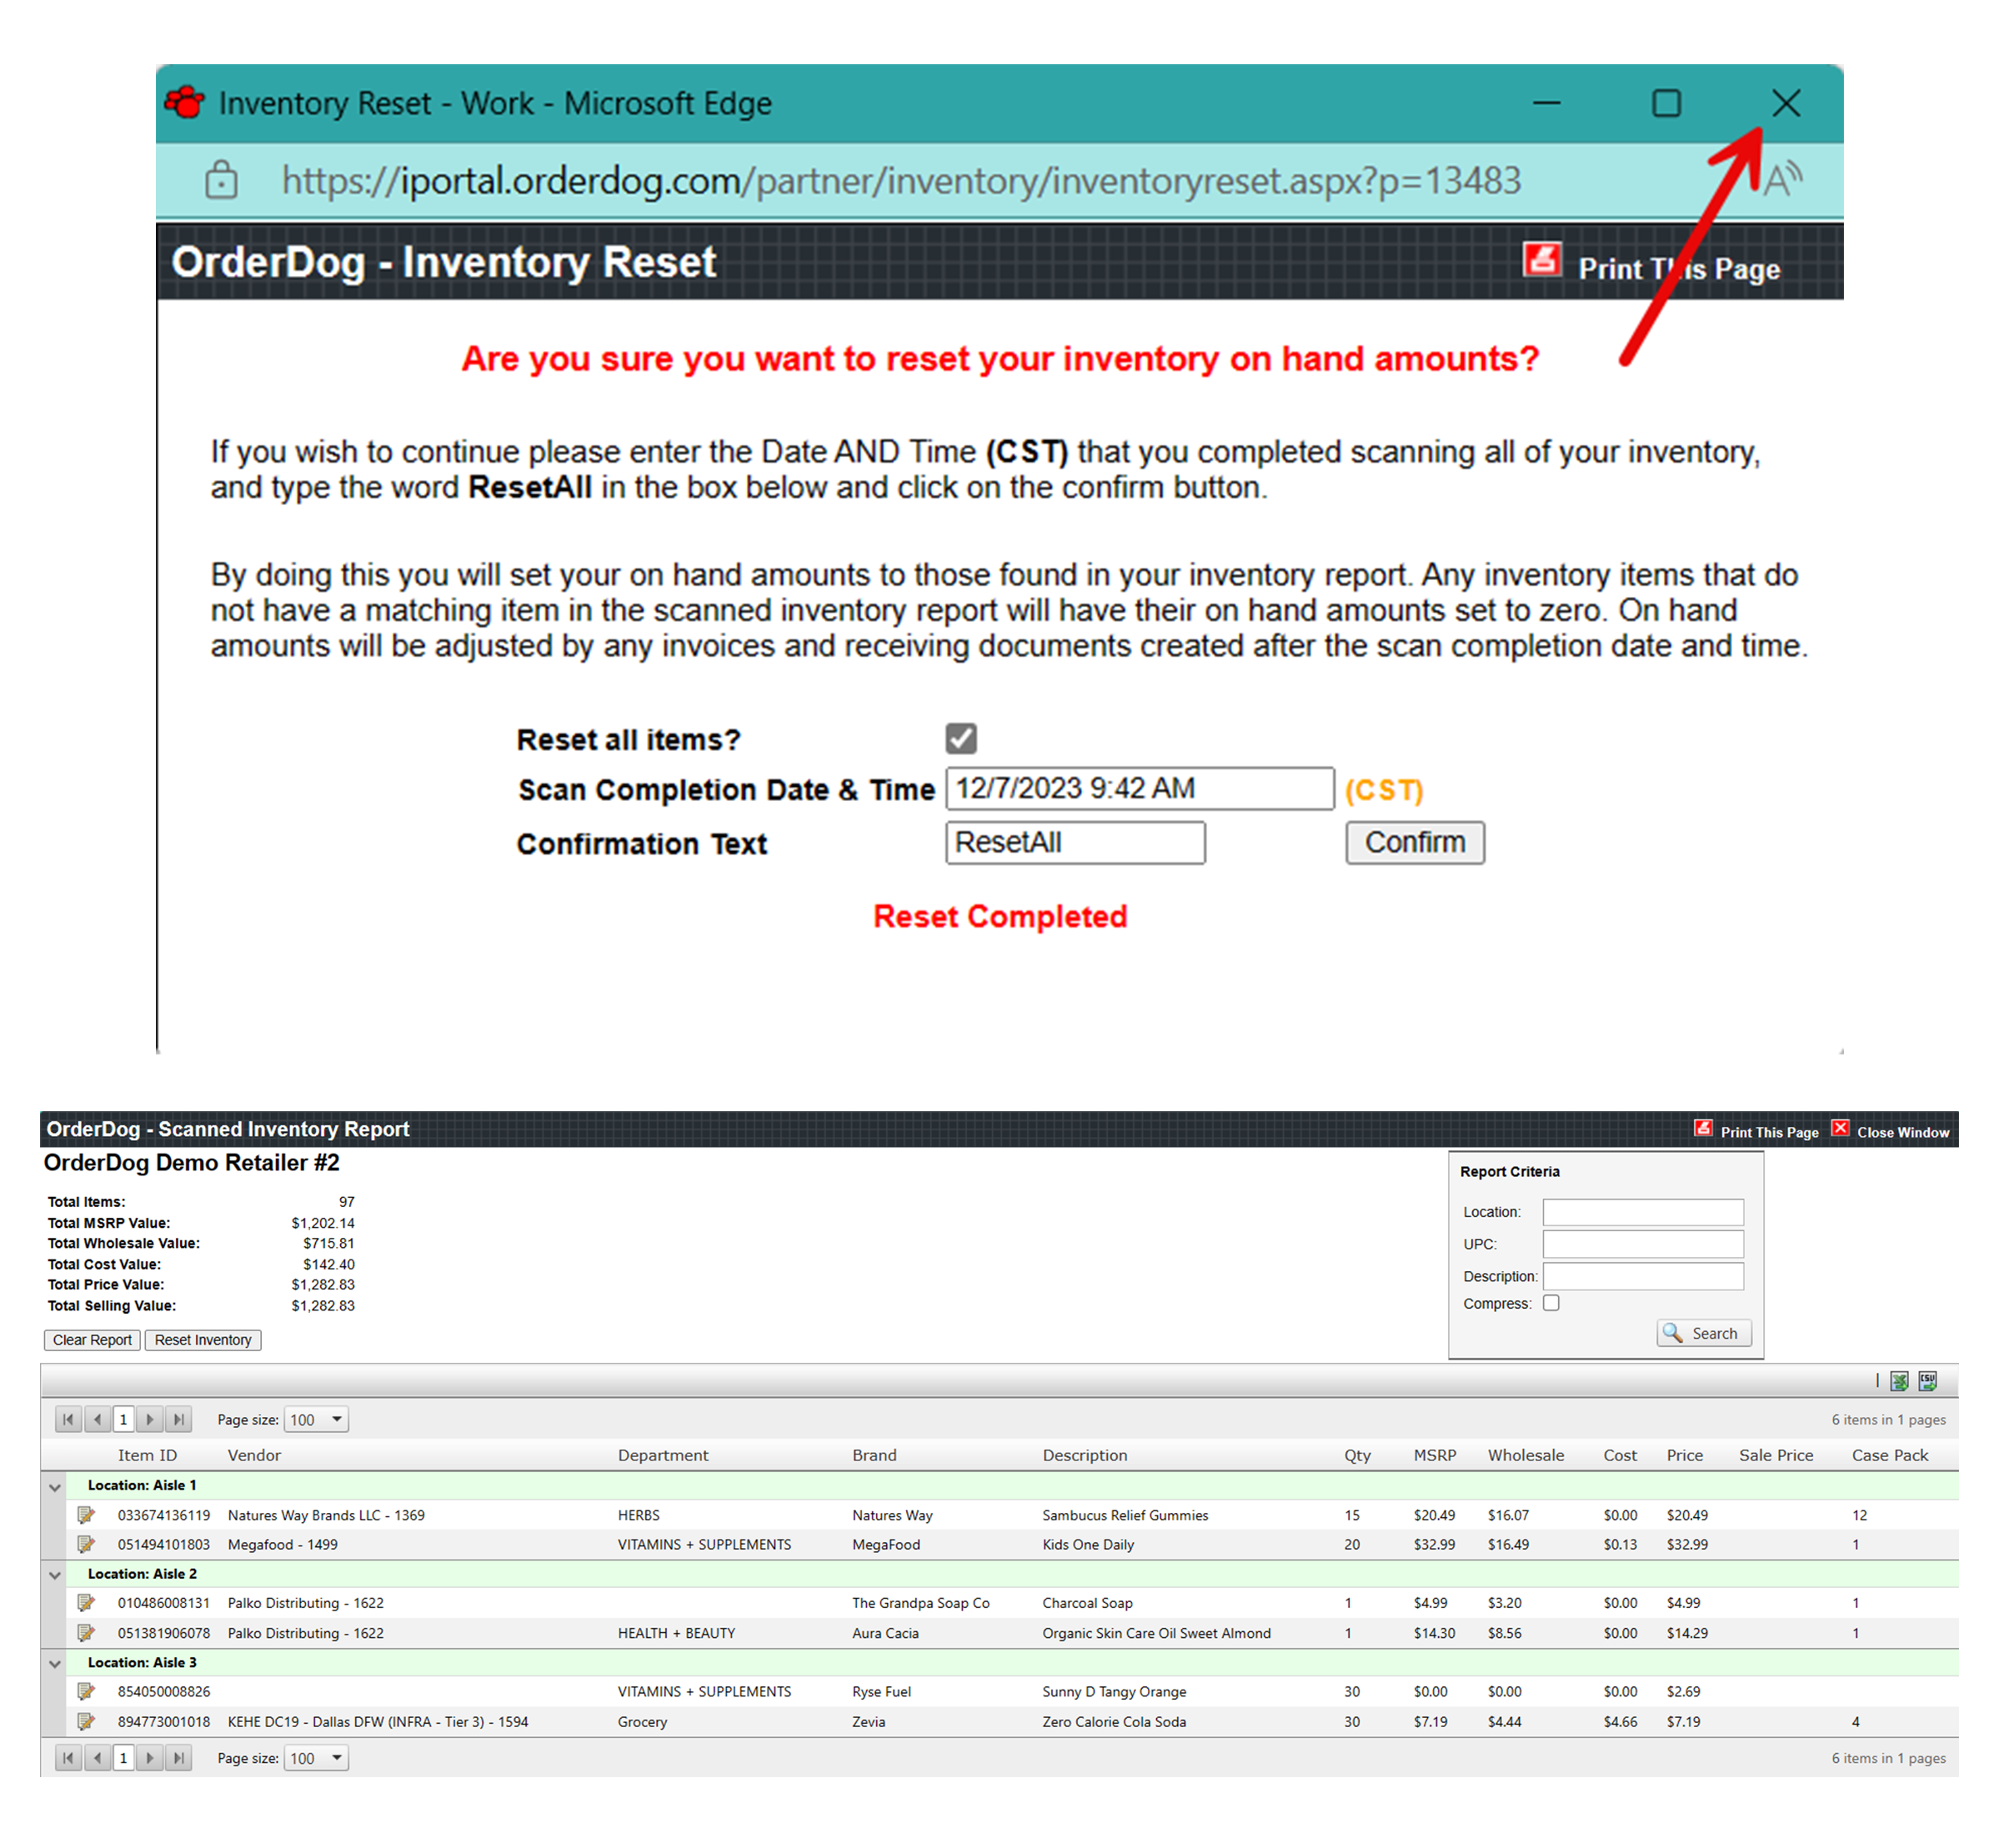
- Now select “Reset Inventory”. This will reset the database with the inventory we entered and sent from the scanner. Check the “Reset all items” box. Confirm by typing “ResetAll” in the Confirmation Text box and clicking “Confirm”.
-
***NOTE: Reset All (recommended when completing inventory at one time) – This action will take all of the values from the scanned inventory report and apply them to your inventory records. Any items in your inventory that are not on the scanner inventory report will be set to zero on hand.
Reset (recommended when completing inventory over the course of several days during store operating hours) – This action will only apply your scanned item counts to those item records. All other inventory records will remain with their current on hand values.
-
- Exit out of the pop up window. You are now able to view your current on hand inventory.

YOU'RE DONE!
There is also a PDF version of this guide attached to this page for your convenience.
McKennan Jones
Comments