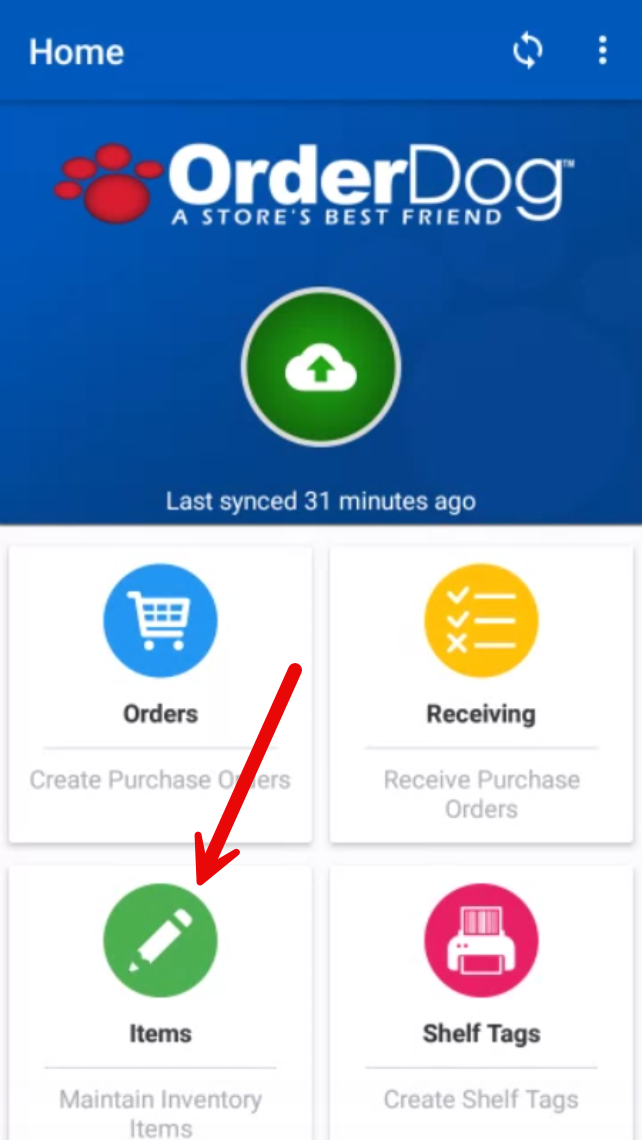
- Starting on the home screen, press the “Items” button to start the item edit process.
- Press the “+” to begin making item changes.
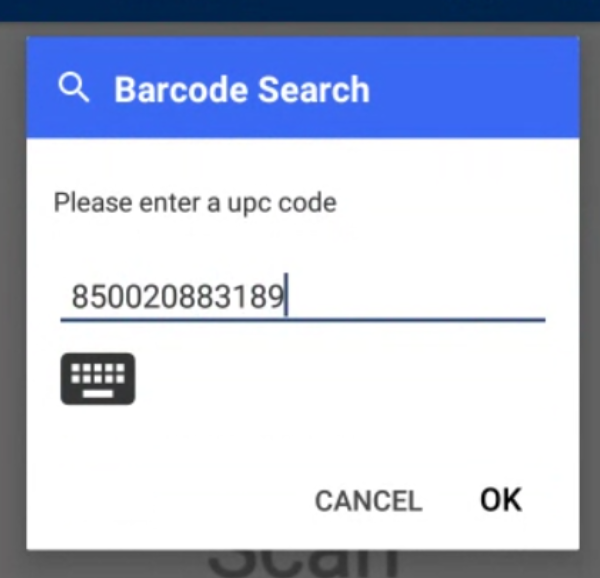
- Scan or manually enter any of the UPCs related to the item you wish to add pack pricing to.
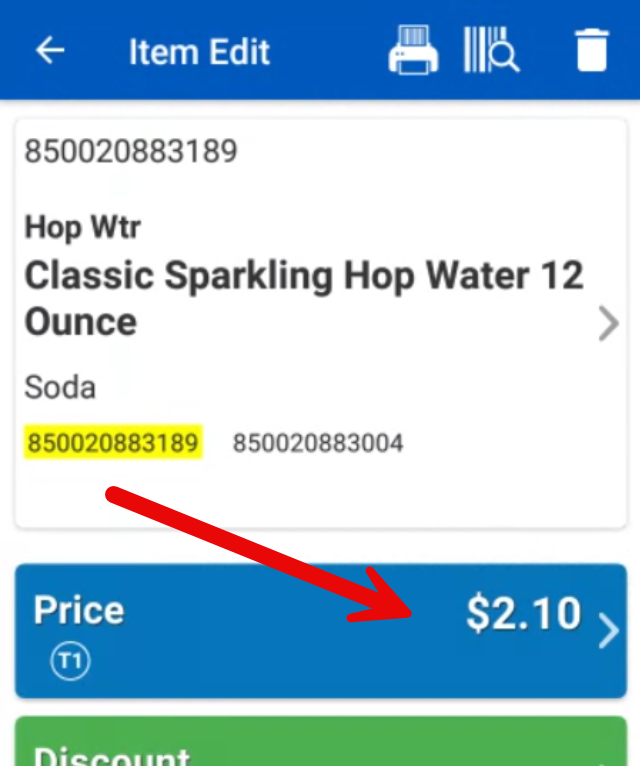
- Press on the “Price” option for the item.
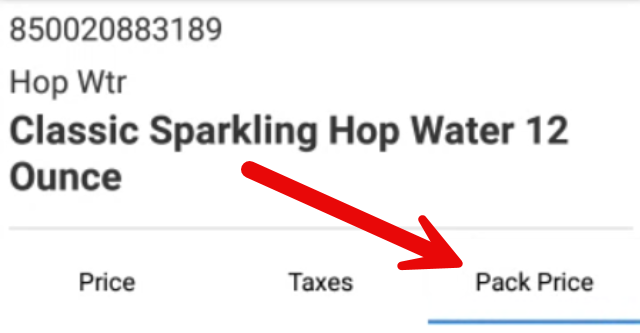
- In this edit section, press the “Pack Price” tab.
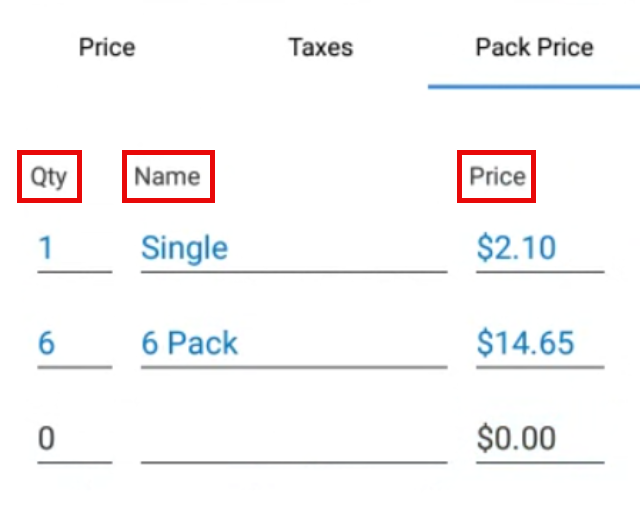
- We will be filling out at least 2 pack entries, one for the pack version of the item, and another for the individual version/another pack version. You may have up to 3 pack pricing entries for pack items, one for each UPC that is linked to the item record already.
- We suggest naming the single version of an item either “Single” or “Individual”. For pack items, we suggest naming them “# Pack”. Make sure to include the number to differentiate between different packs.
- Next, enter the quantity in individual amounts, not by case. For instance, an individual bottle is a quantity of 1, and a pack of 6 is a quantity of 6.
NOTE: It is important to set up packs in this way. OrderDog’s on hand values are based on eaches rather than by cases. When you receive pack items, you should also receive by eaches (individual amounts). - Enter the price that corresponds with that version of the item.
- Fill out the same fields for “Pack 2” with its corresponding name, quantity, and retail price.
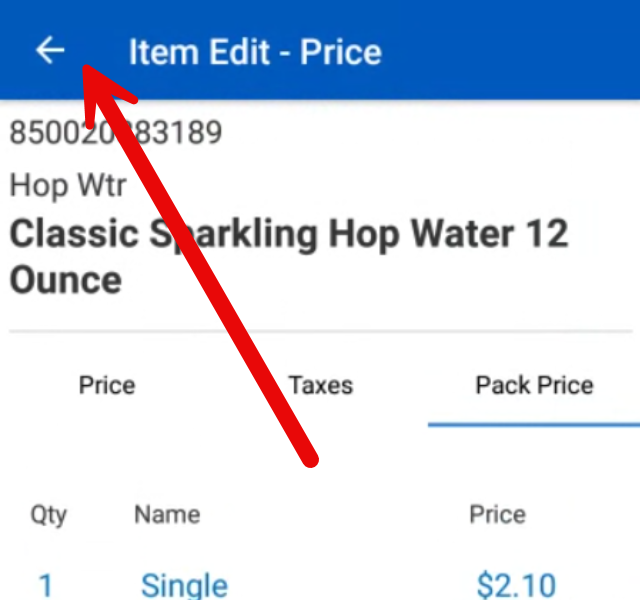
- When you have double checked that everything is grouped accurately, press the back button once.
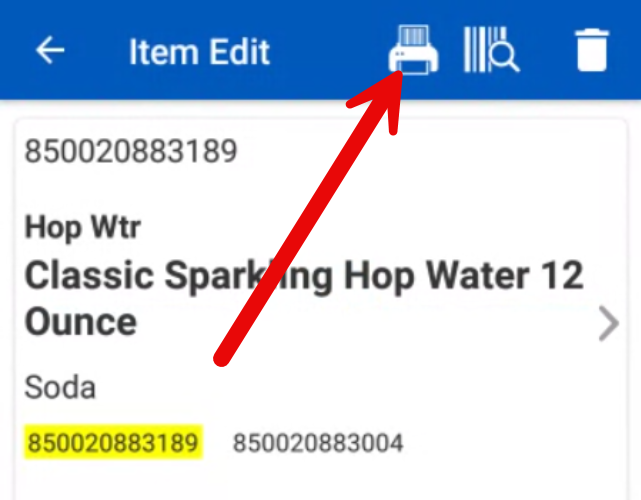
- On the “Item Edit” screen, press the icon that looks like a printer that’s printing out a barcode.
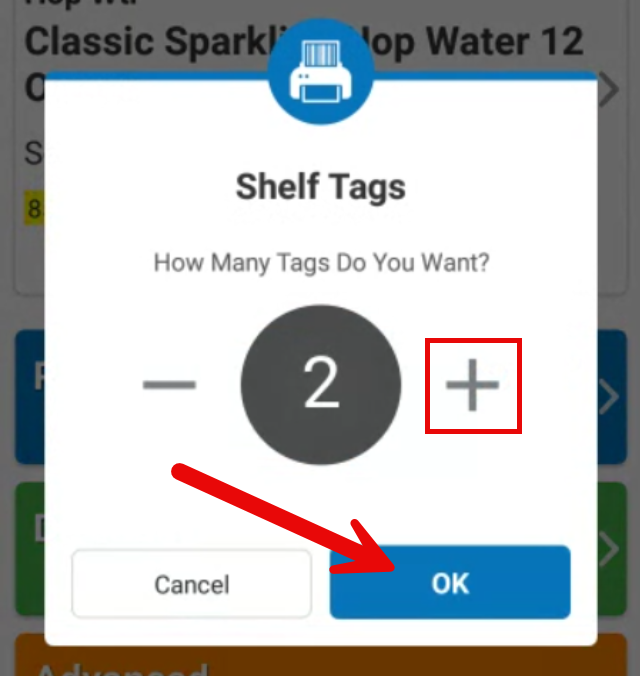
- Press the “+” button to add to the quantity of shelf tags you want to have. We recommend printing an amount equal to the number of packs the item has/UPCs that are linked together. In this case, we are going to request 2 shelf tags. Press “OK”.
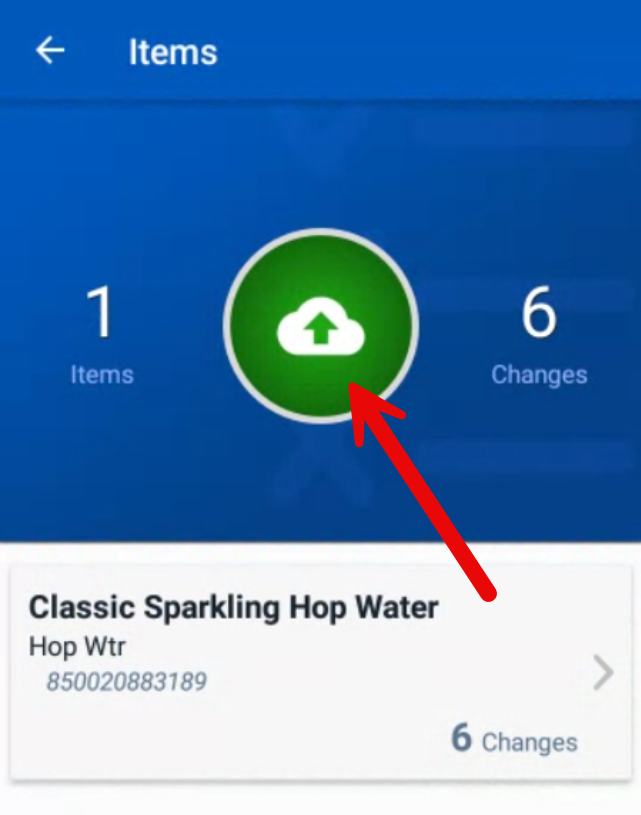
- Press the back button to get to the item edit summary screen. From here, you can either press the green cloud upload button to upload all item edits that appear on this page, or select the individual item that we just edited to upload individually.
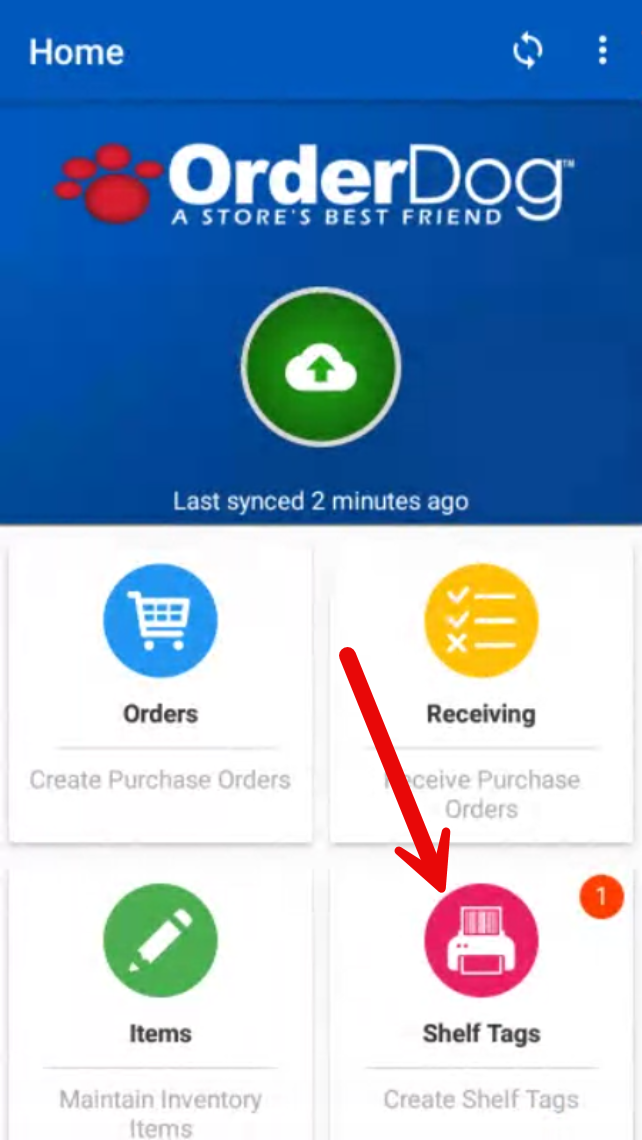
- Press the back button until you return to the scanner home screen. Press the “Shelf Tag” icon, which should have a red circle with the number of shelf tags waiting to be uploaded on it.
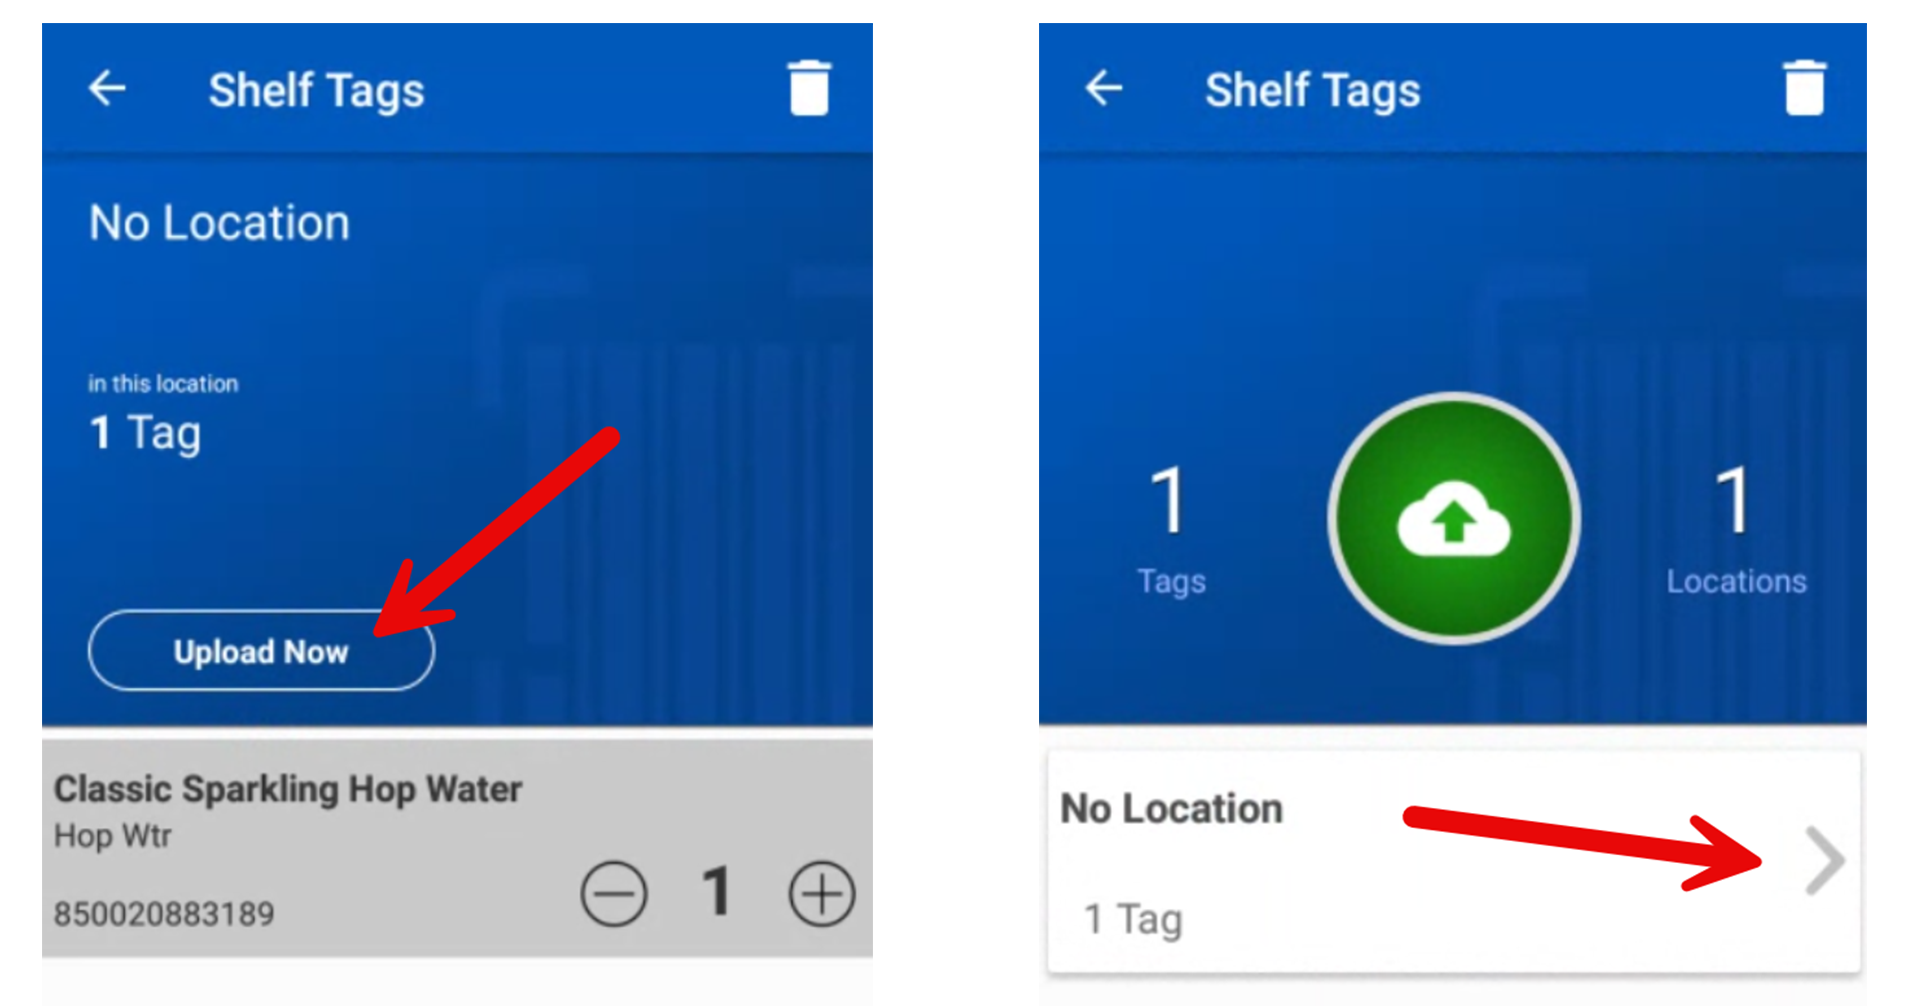
- From here, you can either press the green cloud upload button to upload all shelf tags that appear on this page, or select the individual shelf tag(s) that you want to upload individually.
- Once the shelf tags have been uploaded, they will be queued up on the portal, ready to set up for printing. Please view the next tutorial in this series, “Shelf Tags for Pack Items”.
YOU'RE DONE!

McKennan Jones
Comments