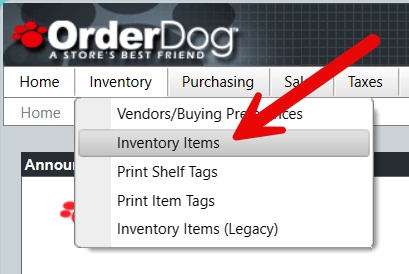
- Starting on the OrderDog portal, navigate under “Inventory” and click “Inventory Items”.
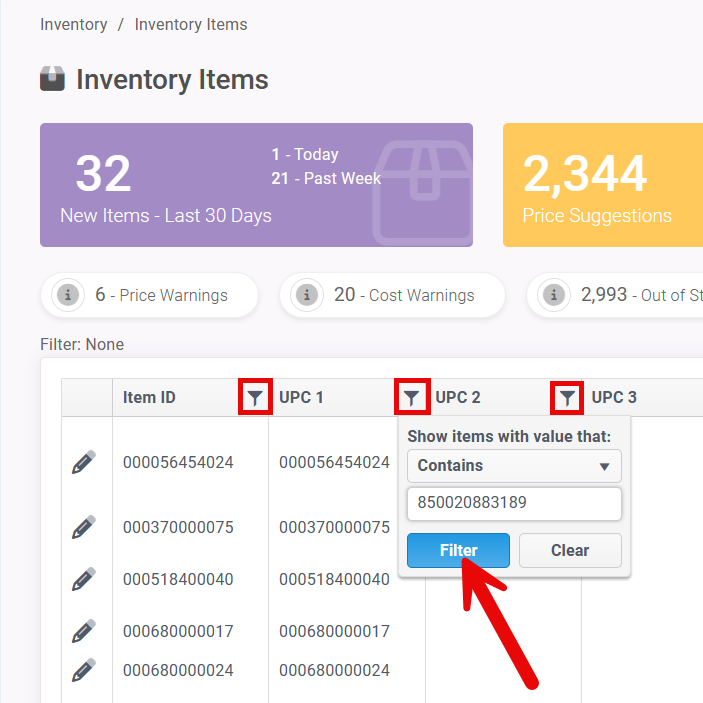
- Look up the UPC you wish to set up pack pricing for.
- Press the pencil icon next to the item entry to edit it.
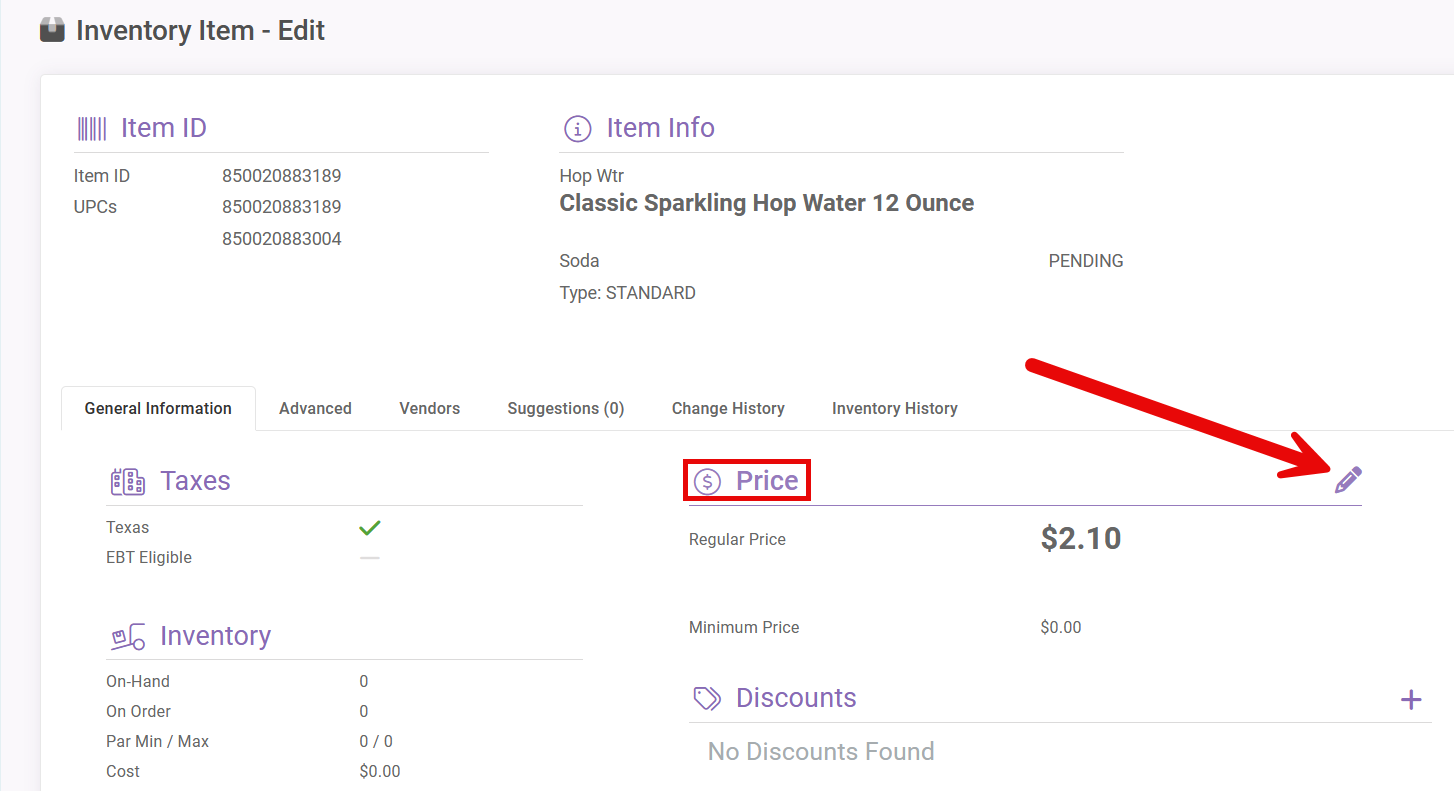
- Hover over the “Price” header and click the pencil that pops up next to it.
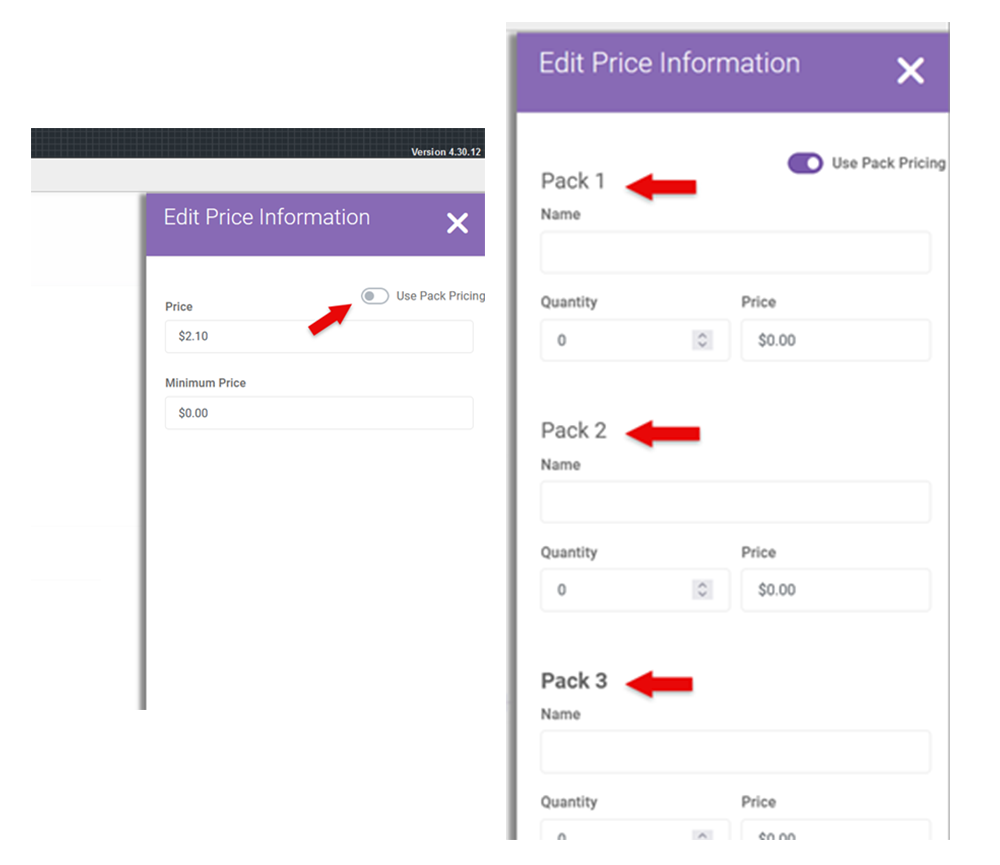
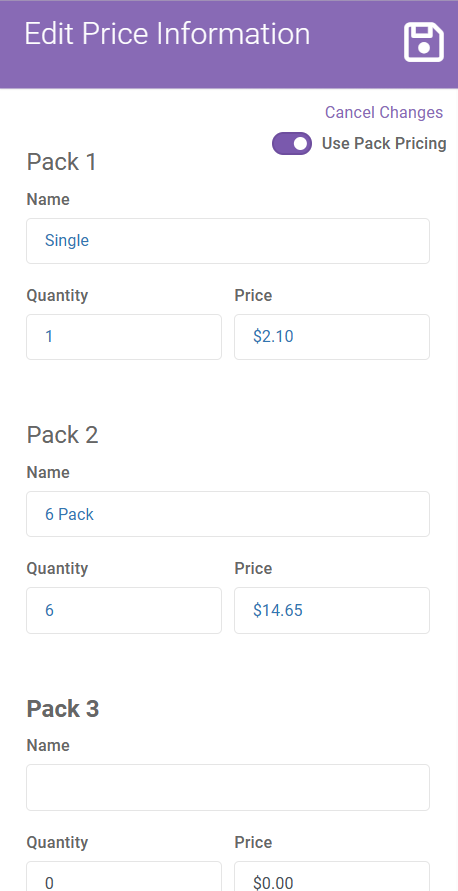
- A pop out called “Edit Price Information” will appear to the right, where you’ll be able to toggle “Use Pack Pricing”.
- We will be filling out at least 2 pack entries, one for the pack version of the item, and another for the individual version/another pack version. You may have up to 3 pack pricing entries for pack items, one for each UPC that is linked to the item record already.
- We suggest naming the single version of an item either “Single” or “Individual”. For pack items, we suggest naming them “# Pack”. Make sure to include the number to differentiate between different packs.
- Next, enter the quantity in individual amounts, not by case. For instance, an individual bottle is a quantity of 1, and a pack of 6 is a quantity of 6.
NOTE: It is important to set up packs in this way. OrderDog’s on hand values are based on eaches rather than by cases. When you receive pack items, you should also receive by eaches (individual amounts). - Enter the price that corresponds with that version of the item.
- Fill out the same fields for “Pack 2” with its corresponding name, quantity, and retail price.
- Once you have double checked that everything is
properly grouped, press the save icon in the top right of the pop out. These items now have pack pricing set up and are ready to have shelf tags made for them.
YOU'RE DONE!
If you would like to learn how to set up pack pricing on the mobile scanner, you can follow our tutorial for Setting Up Pack Pricing (Mobile Scanner).
If you would like to print shelf tags for items that have been set up with pack pricing, you can follow our tutorial on Shelf Tags for Pack Items.

McKennan Jones
Comments