Please watch the following video, or read the content below for a step-by-step guide on how to perform an exchange return without a receipt with additional products.
(There is also a PDF version of this guide attached to this page for your convenience.)
- NOTE: To do an exchange return, we will need to:
- Return item(s) for store credit.
- Purchase the exchange item(s) with the store credit.
- Purchase any additional products with another tender type.
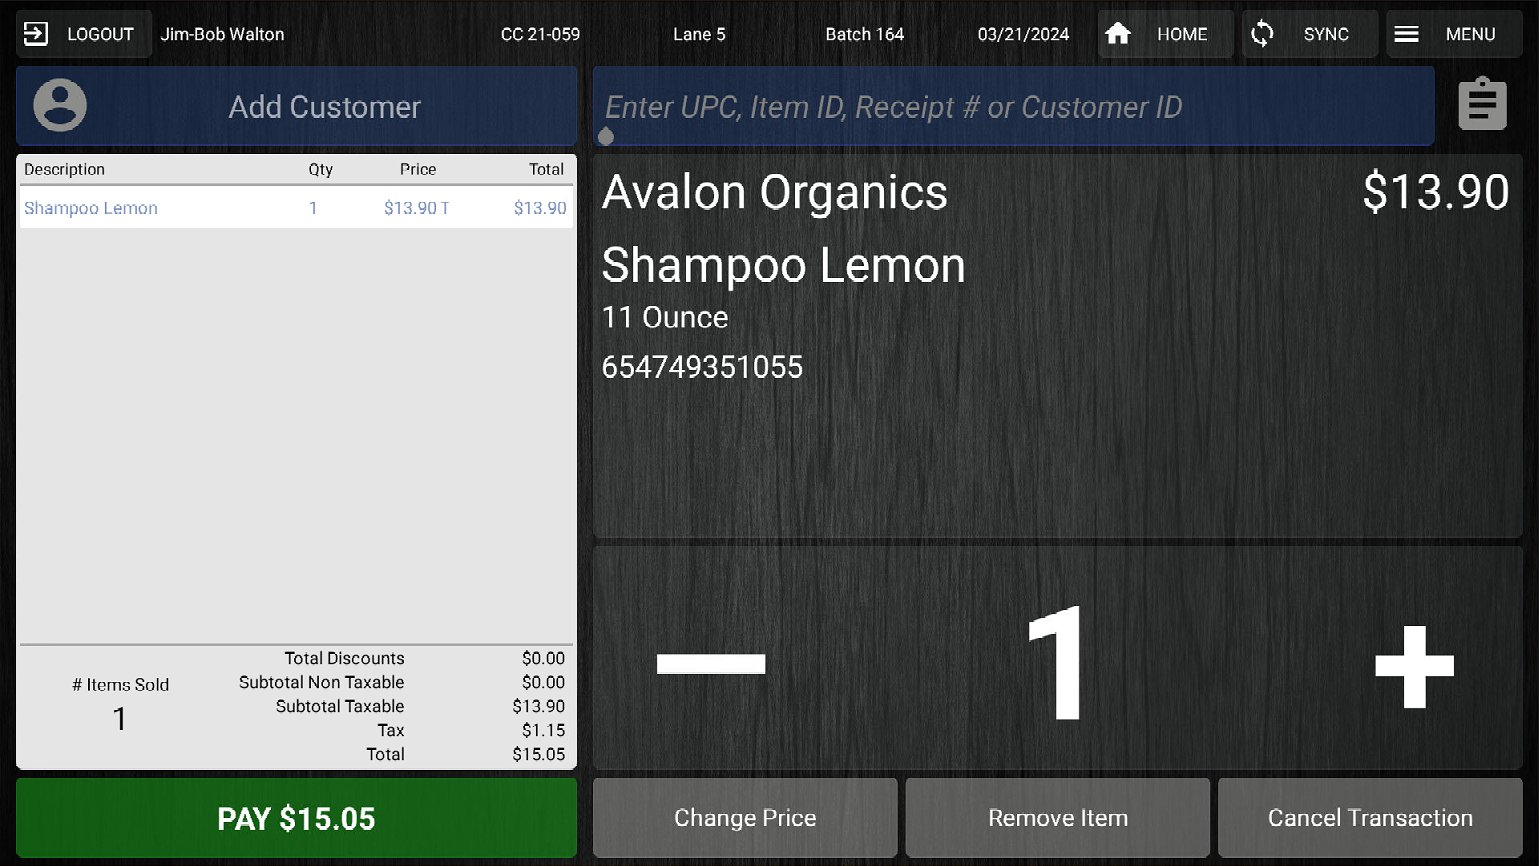
- First, scan or enter the product(s) that need to be exchanged.
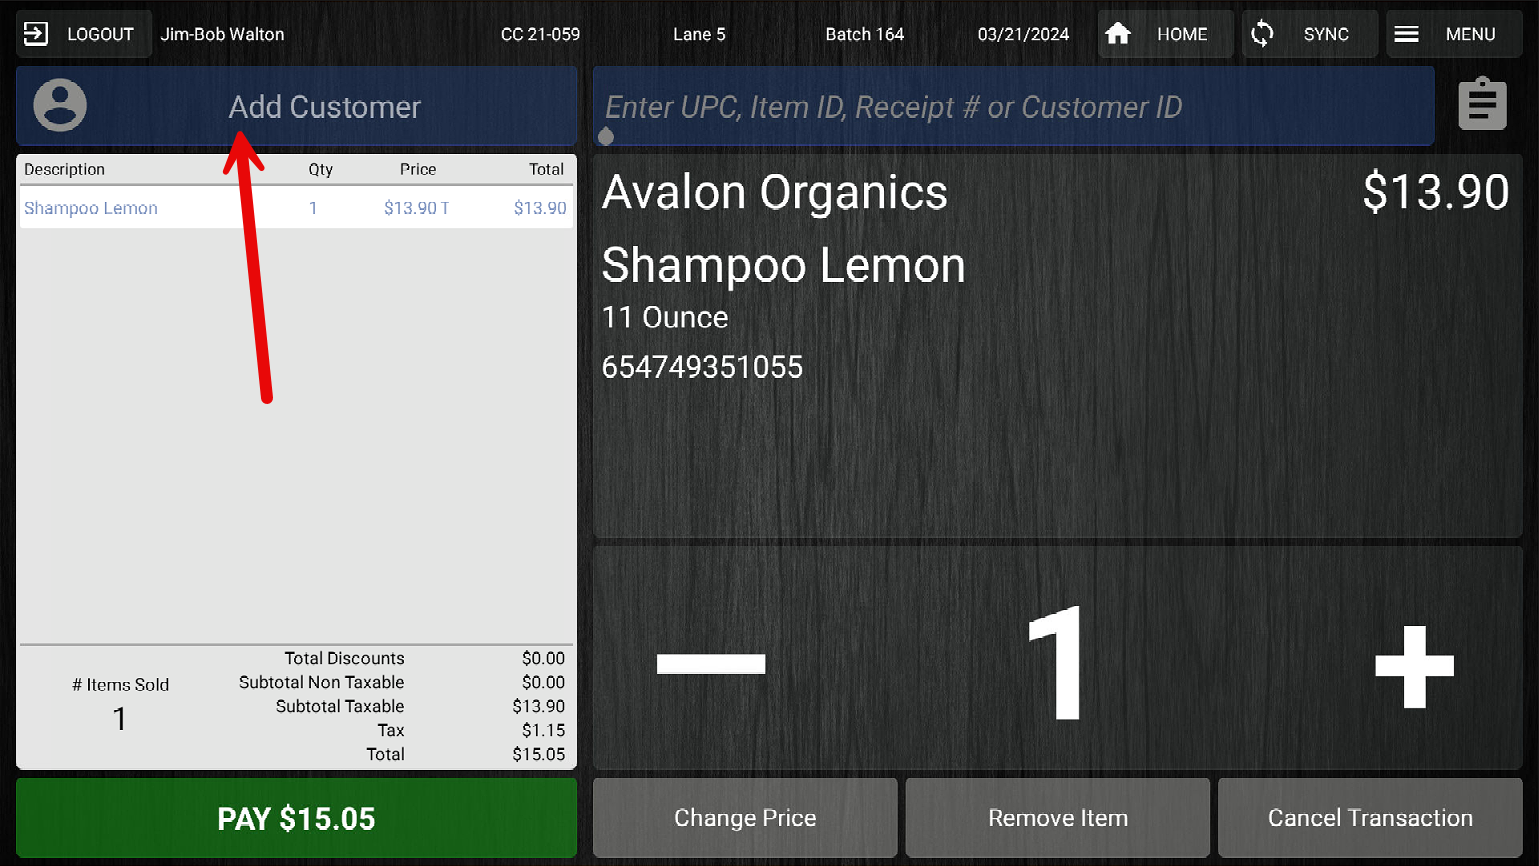
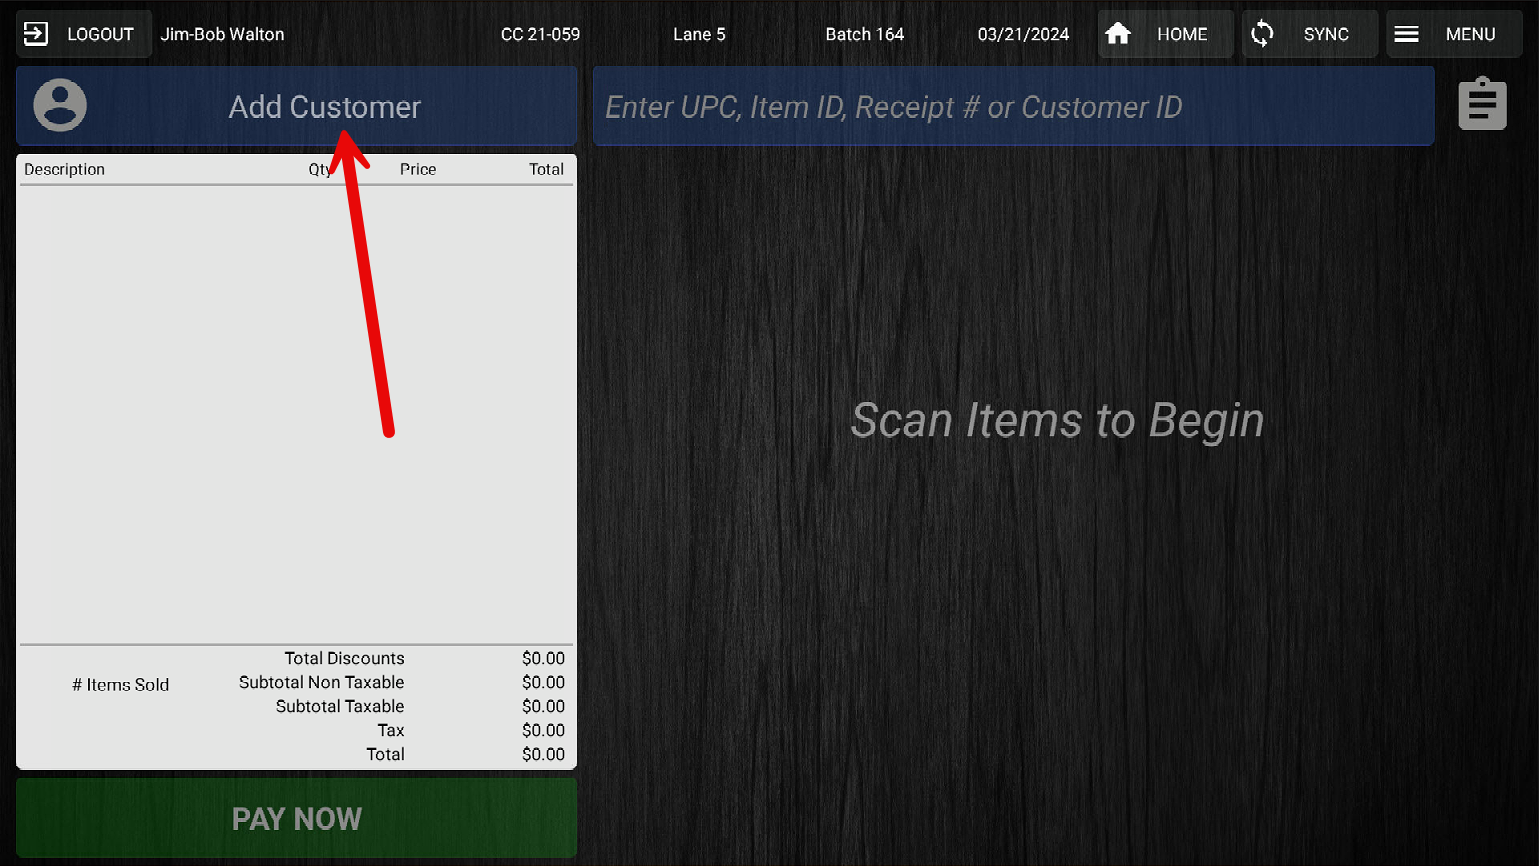
- Next, add the customer to the transaction by tapping the “Add Customer” button.
- Tap on the “Menu” button in the top-right corner. Tap on “Return Without Receipt”.
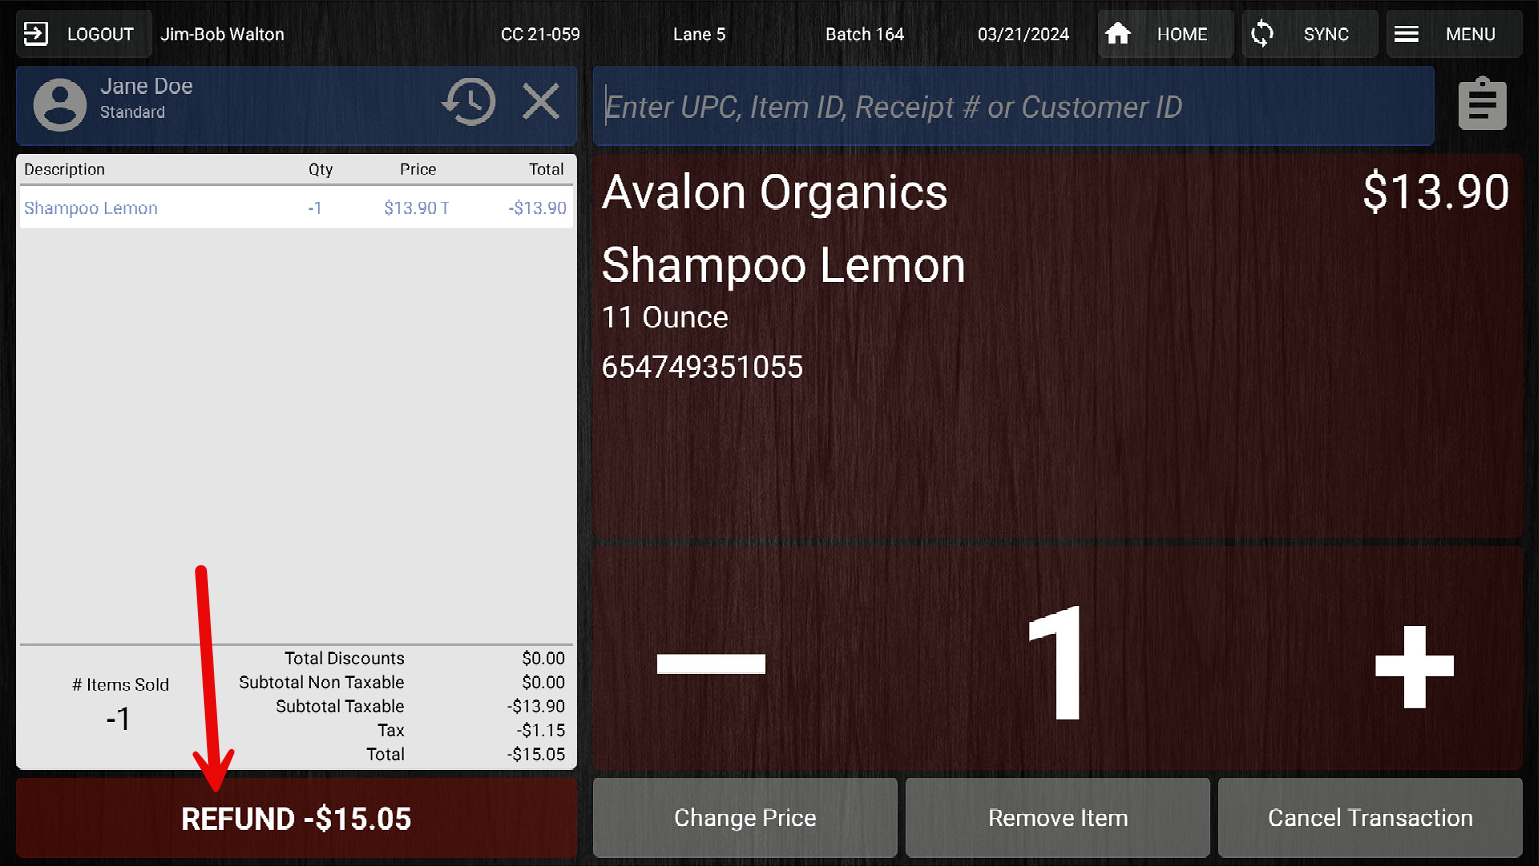
- The screen has now changed to refund mode. Tap on the “Refund” button to continue.
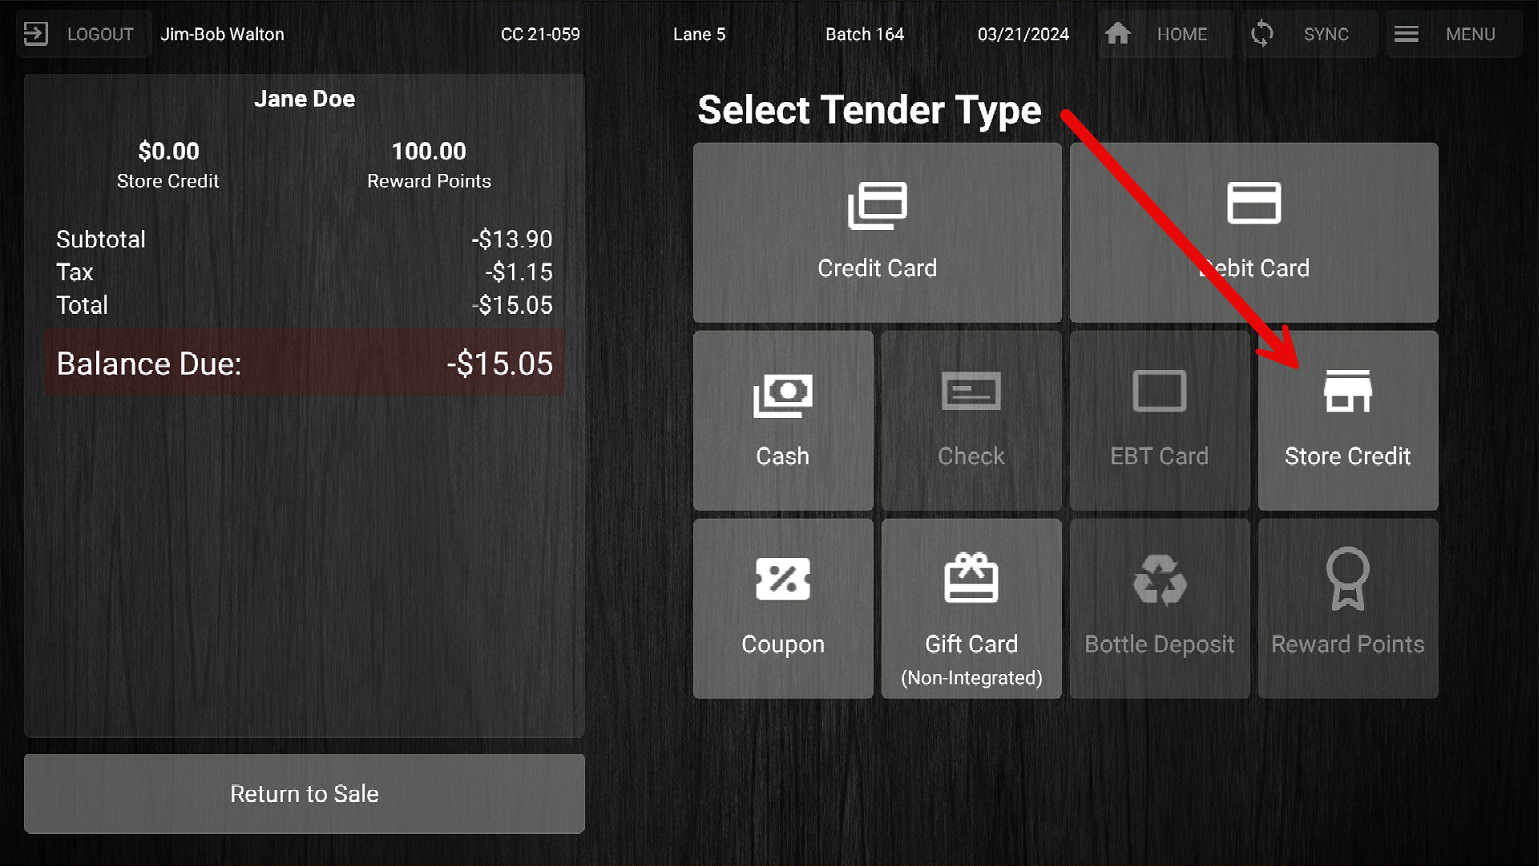
- Select the “Store Credit” tender type.
- Enter the amount or use the blue quick key to add store credit.
- Select a receipt option to complete this part of the transaction.
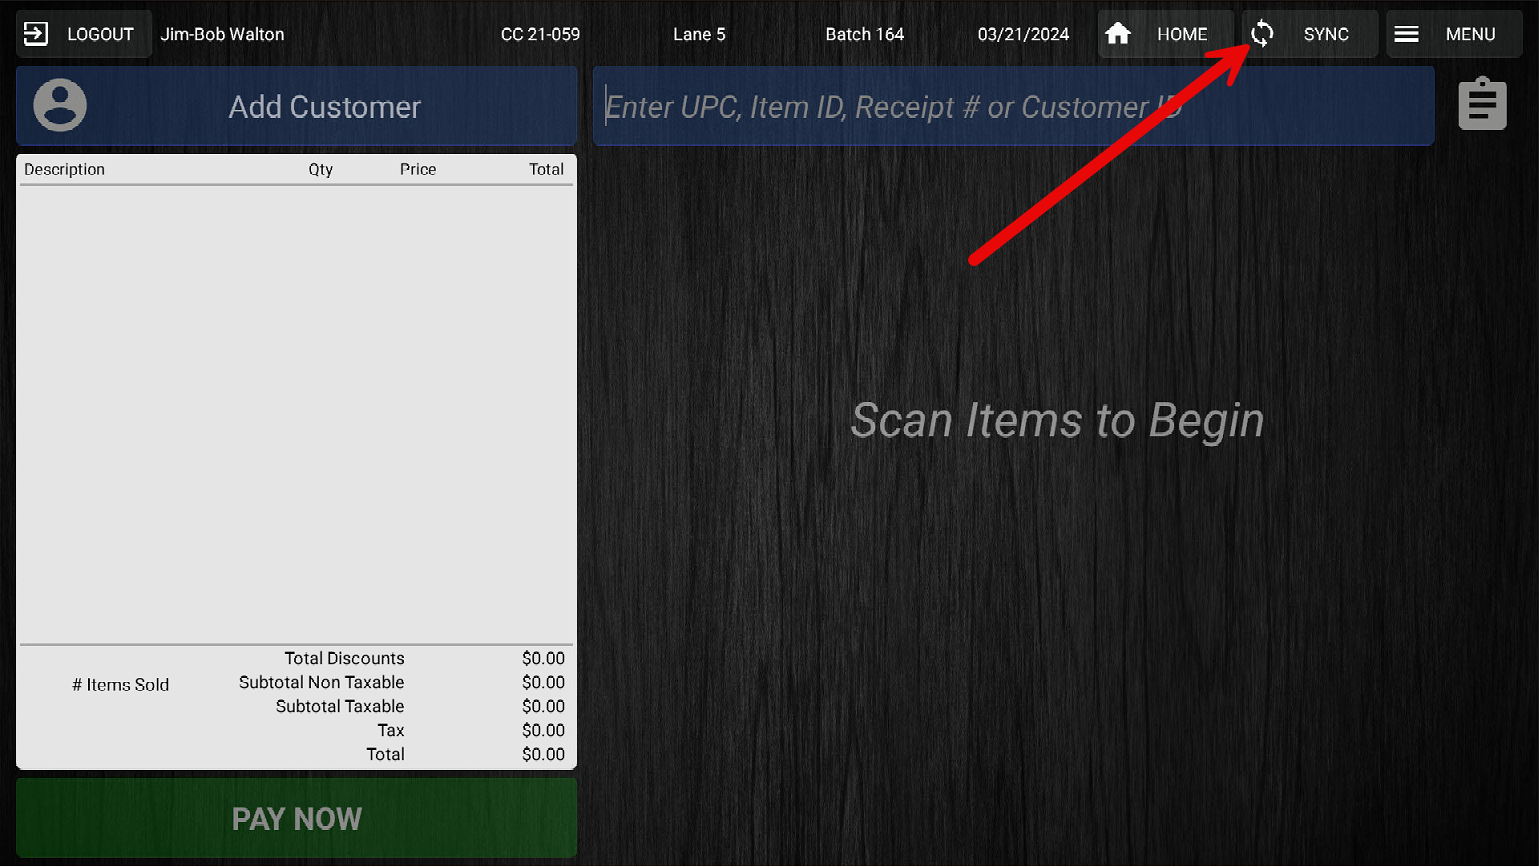
- Before you do anything, make sure that you perform a manual sync. Press the “Sync” button, which is next to the “Menu” button.
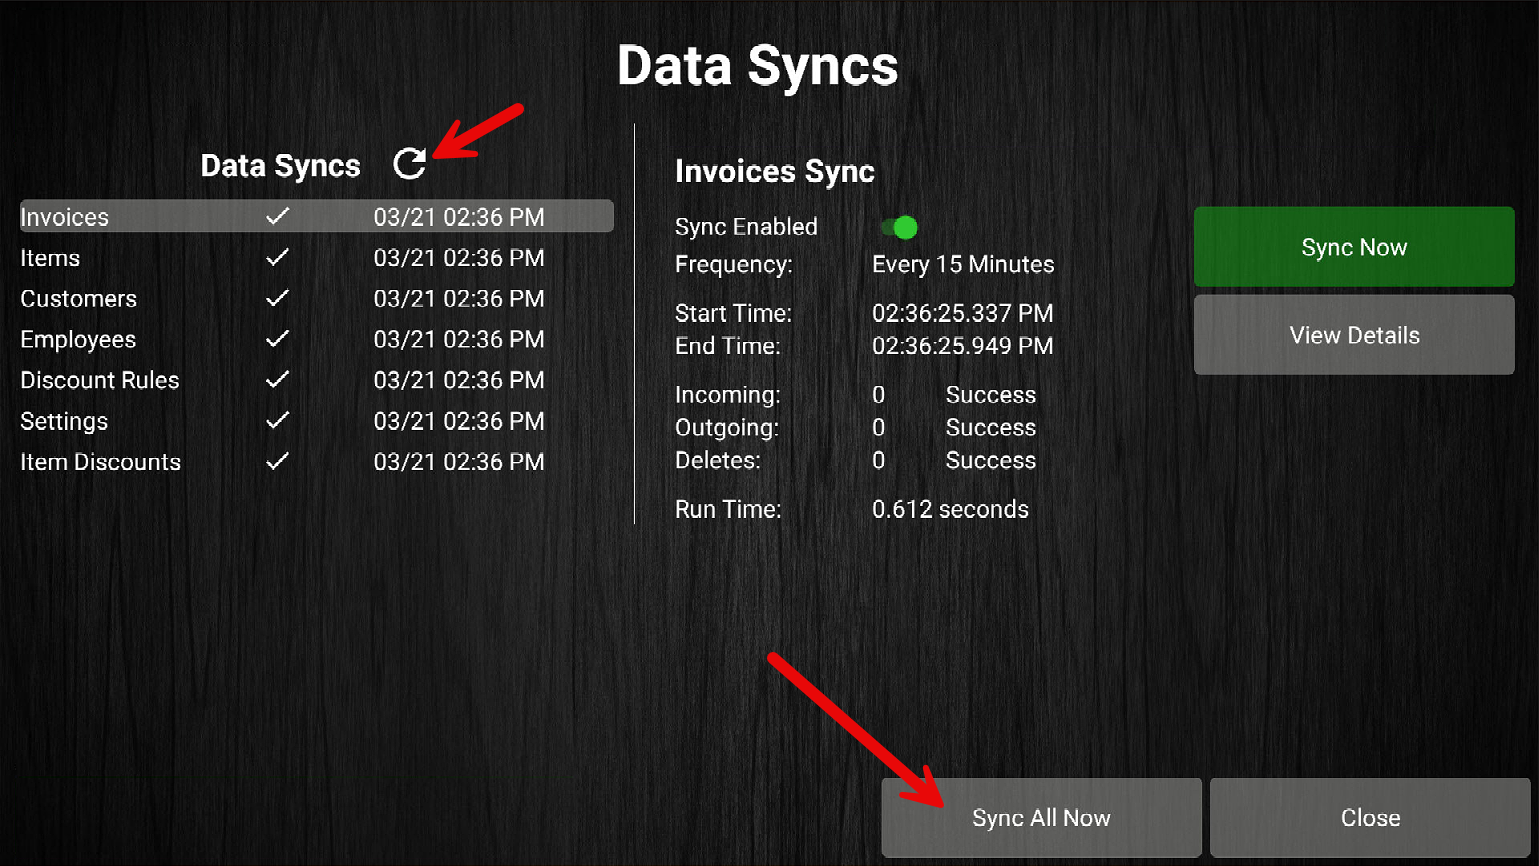
- Tap “Sync All Now”, and then press the cycling arrow icon next to “Data Syncs” to make sure all of the syncs were successful. Press “Close” when you’re done.
- Add the customer to the transaction again using the “Add Customer” button.
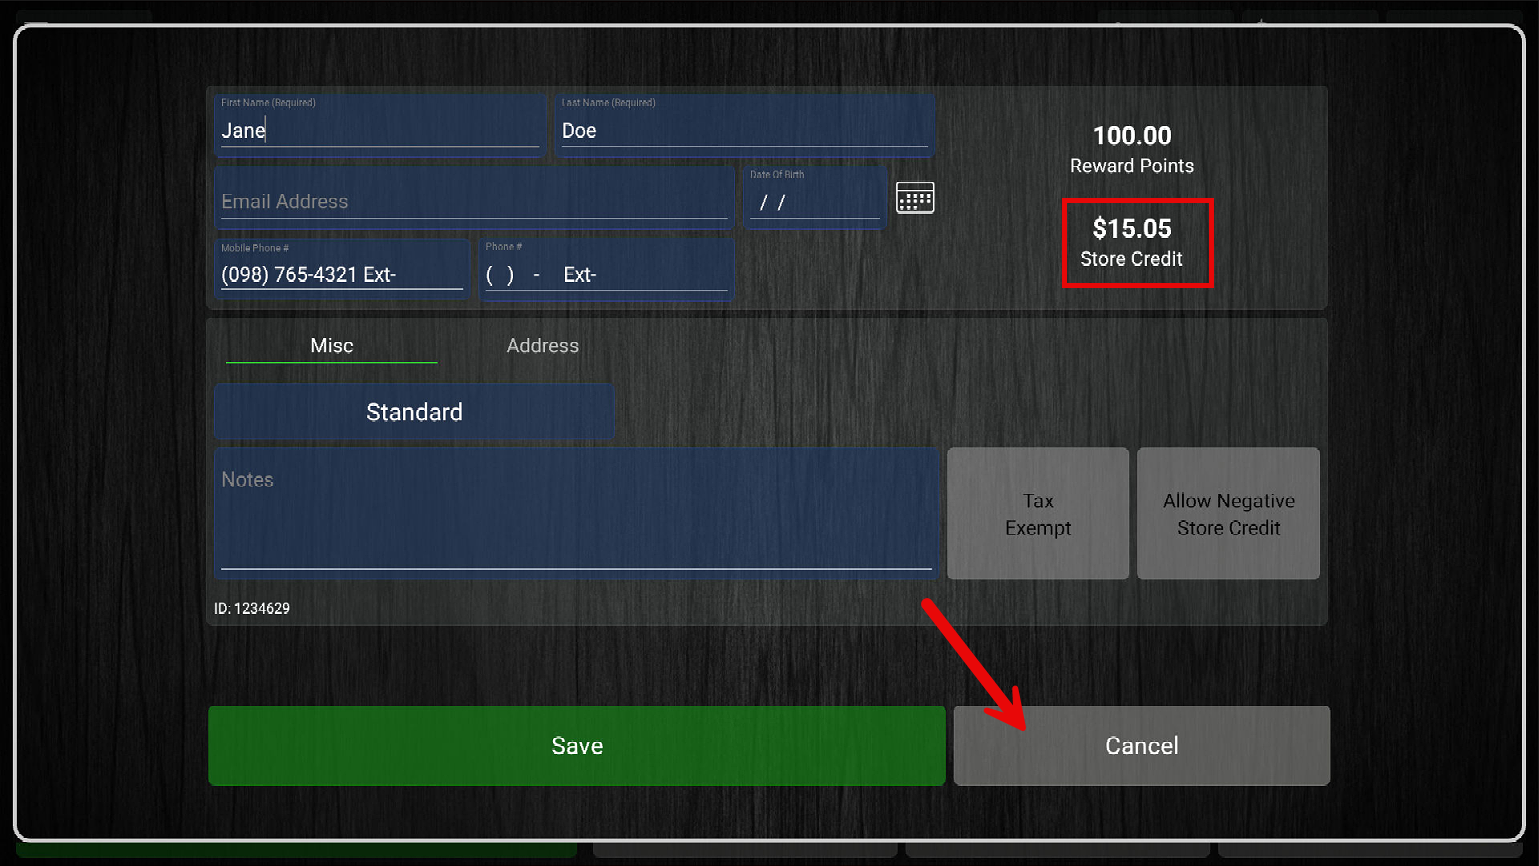
- In case you need to check, click on the customer’s name again to view their current store credit balance. Press “Cancel” to go back to the transaction.
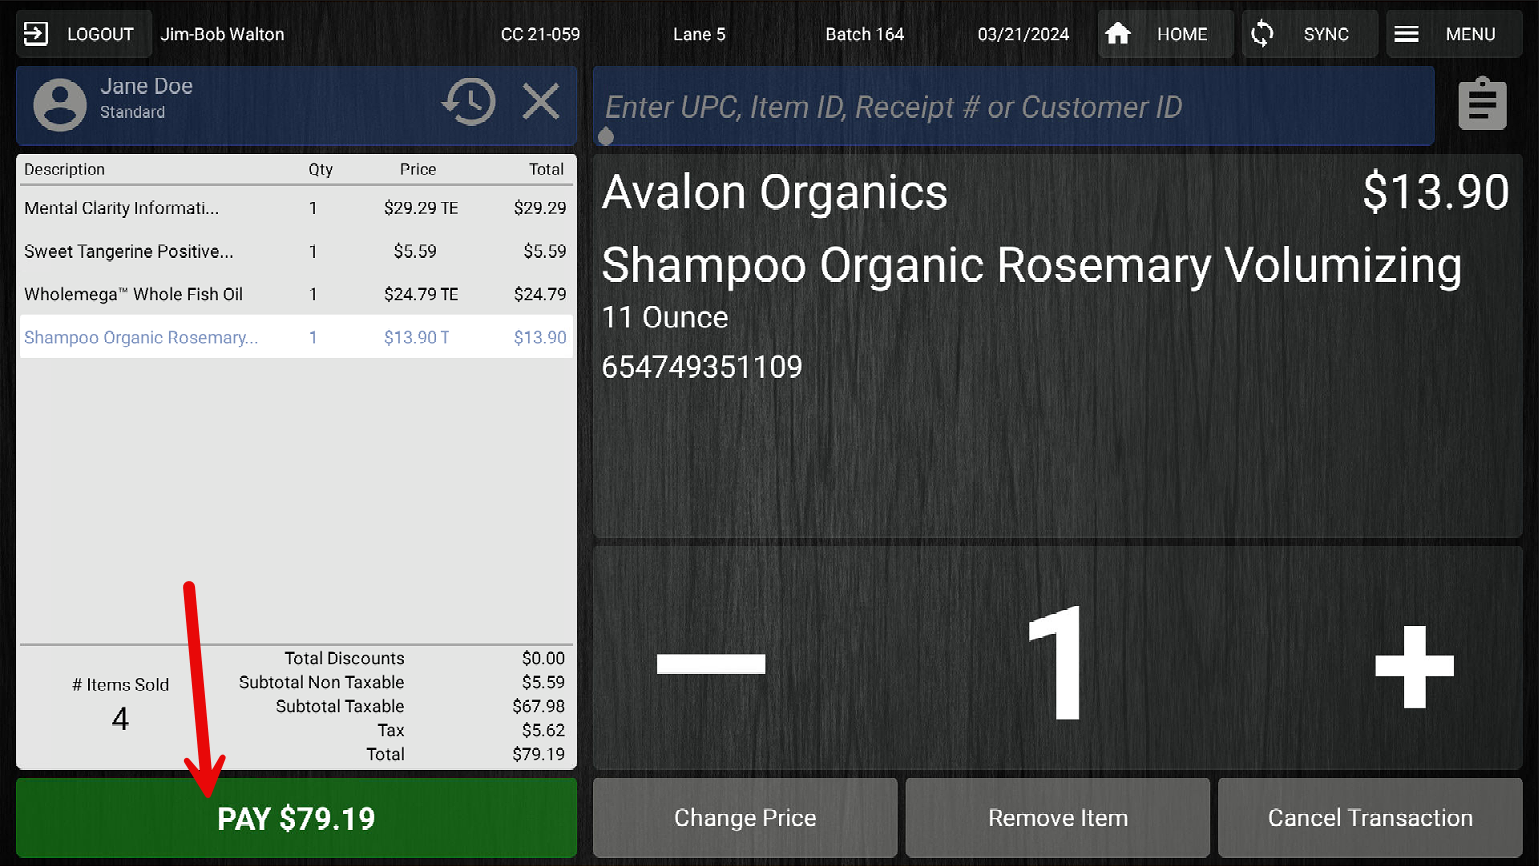
- Now, enter or scan the new product(s) that are being exchanged for. Press the “Pay” button once you have reviewed that the transaction details are correct.
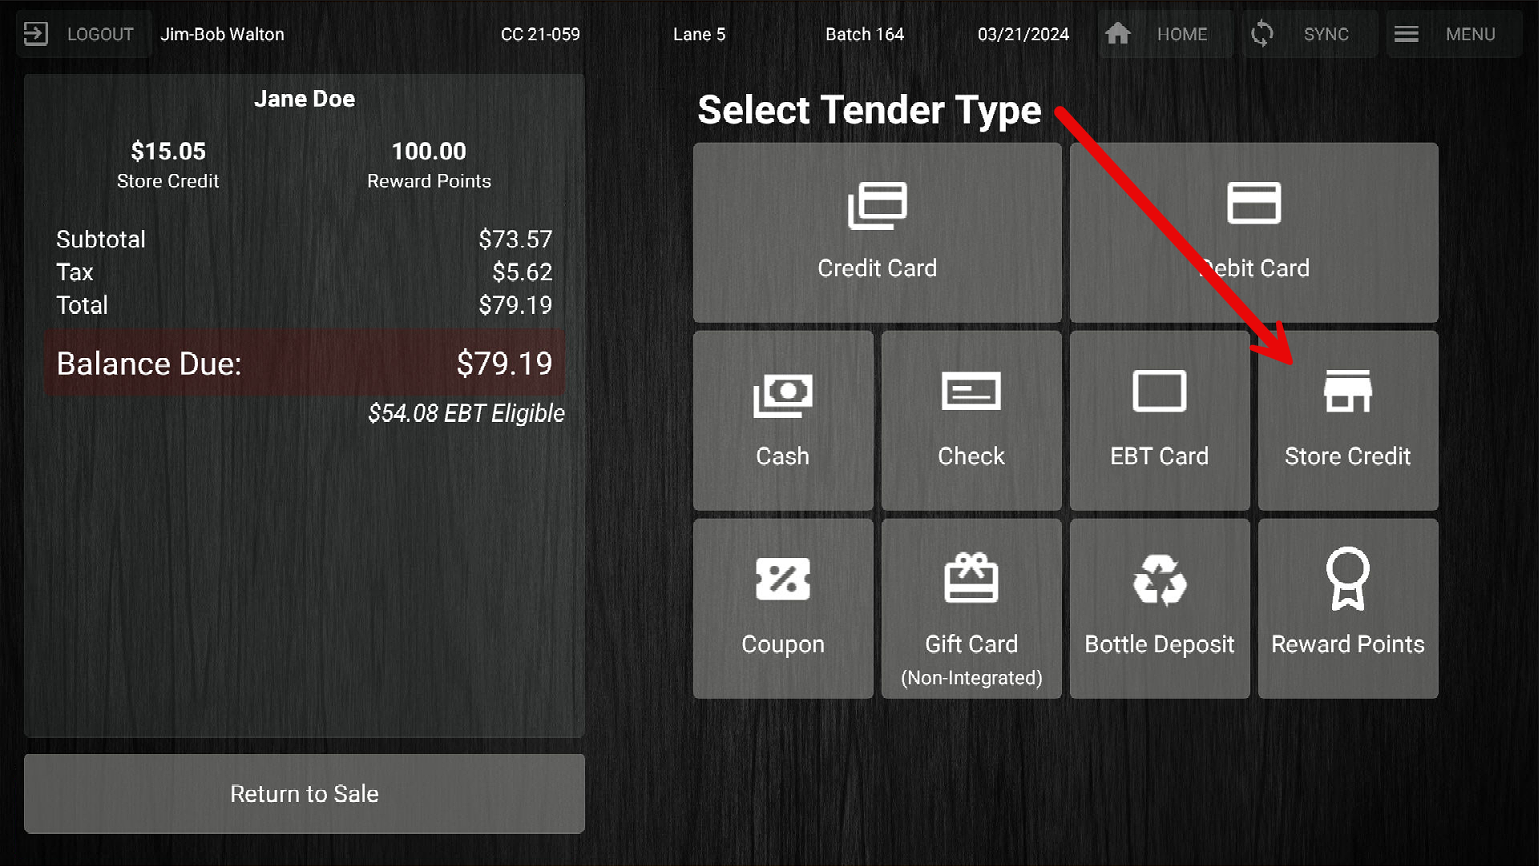
- Select the “Store Credit” tender type to pay for the exchange.
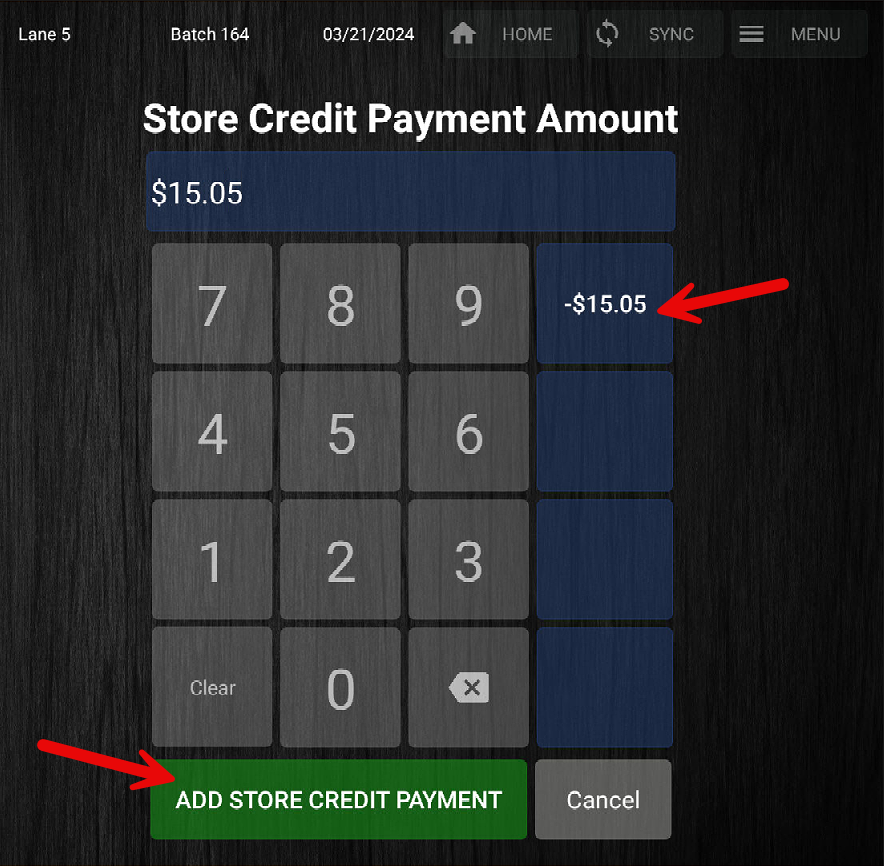
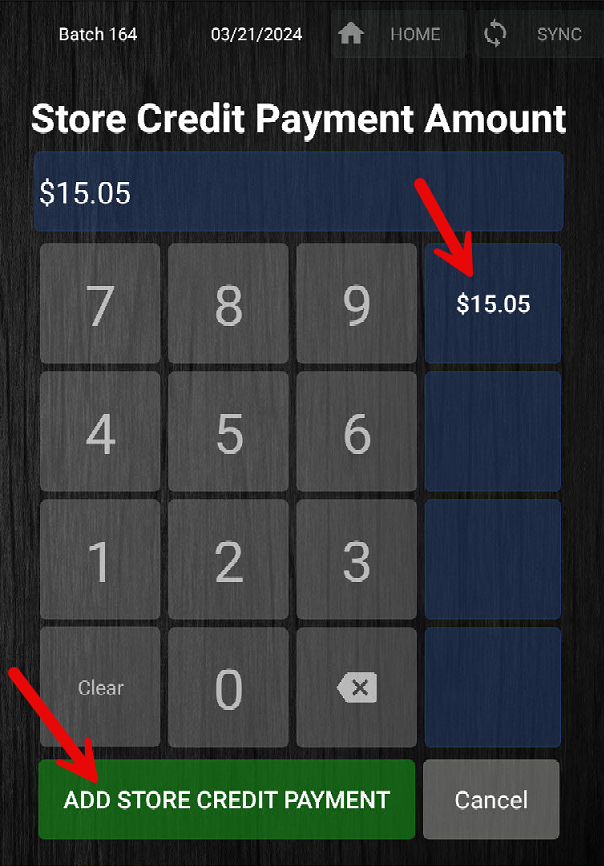
- Enter the amount or use the blue quick key to add the store credit payment. Notice that the customer balance matches with the blue quick key.
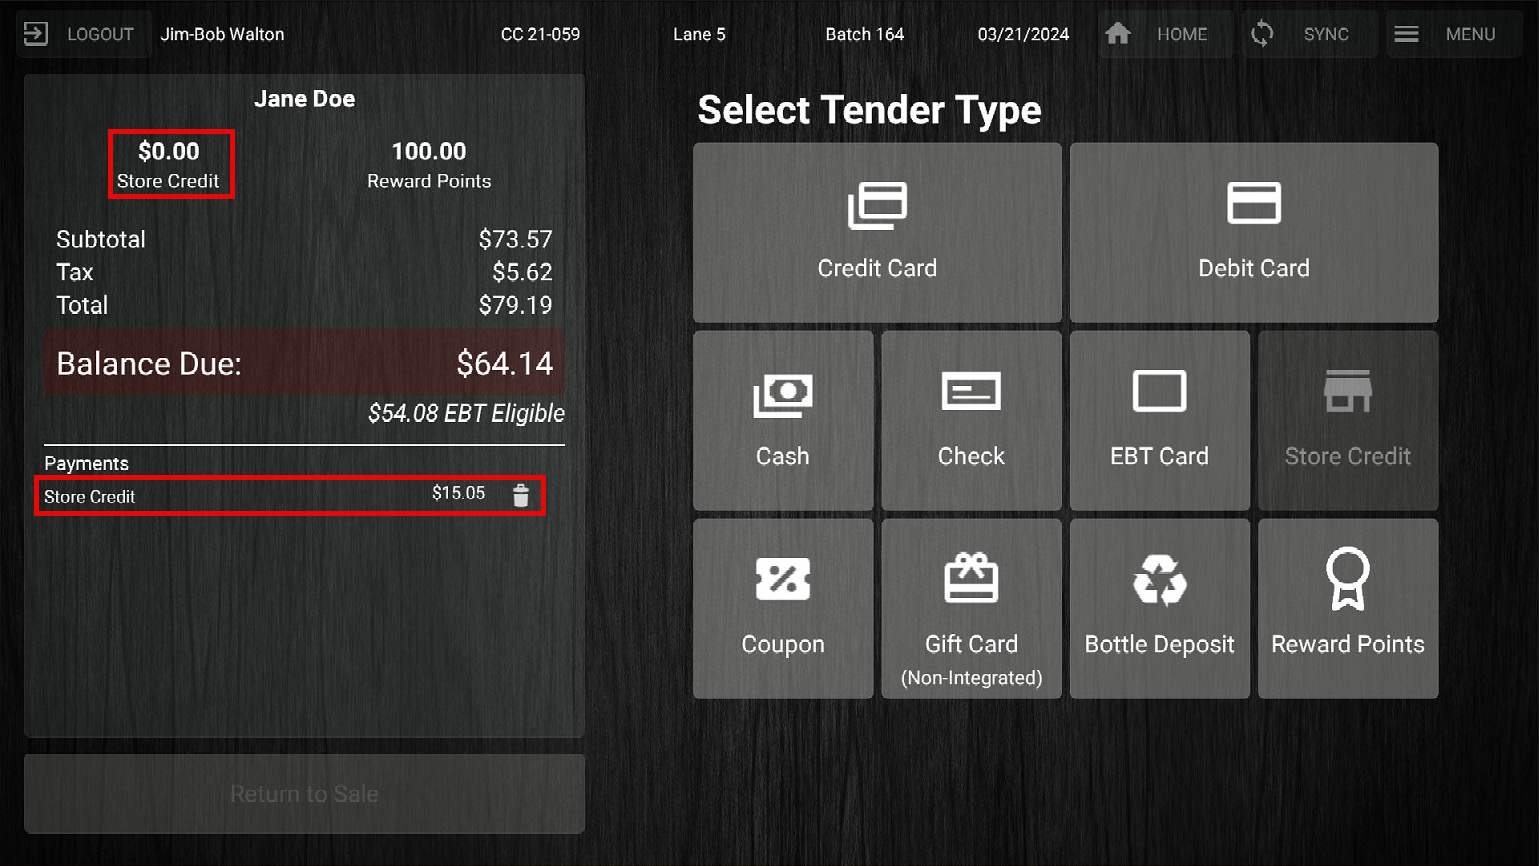
- The customer balance will now be “$0.00”, assuming they don’t have any other store credit from previous transactions.
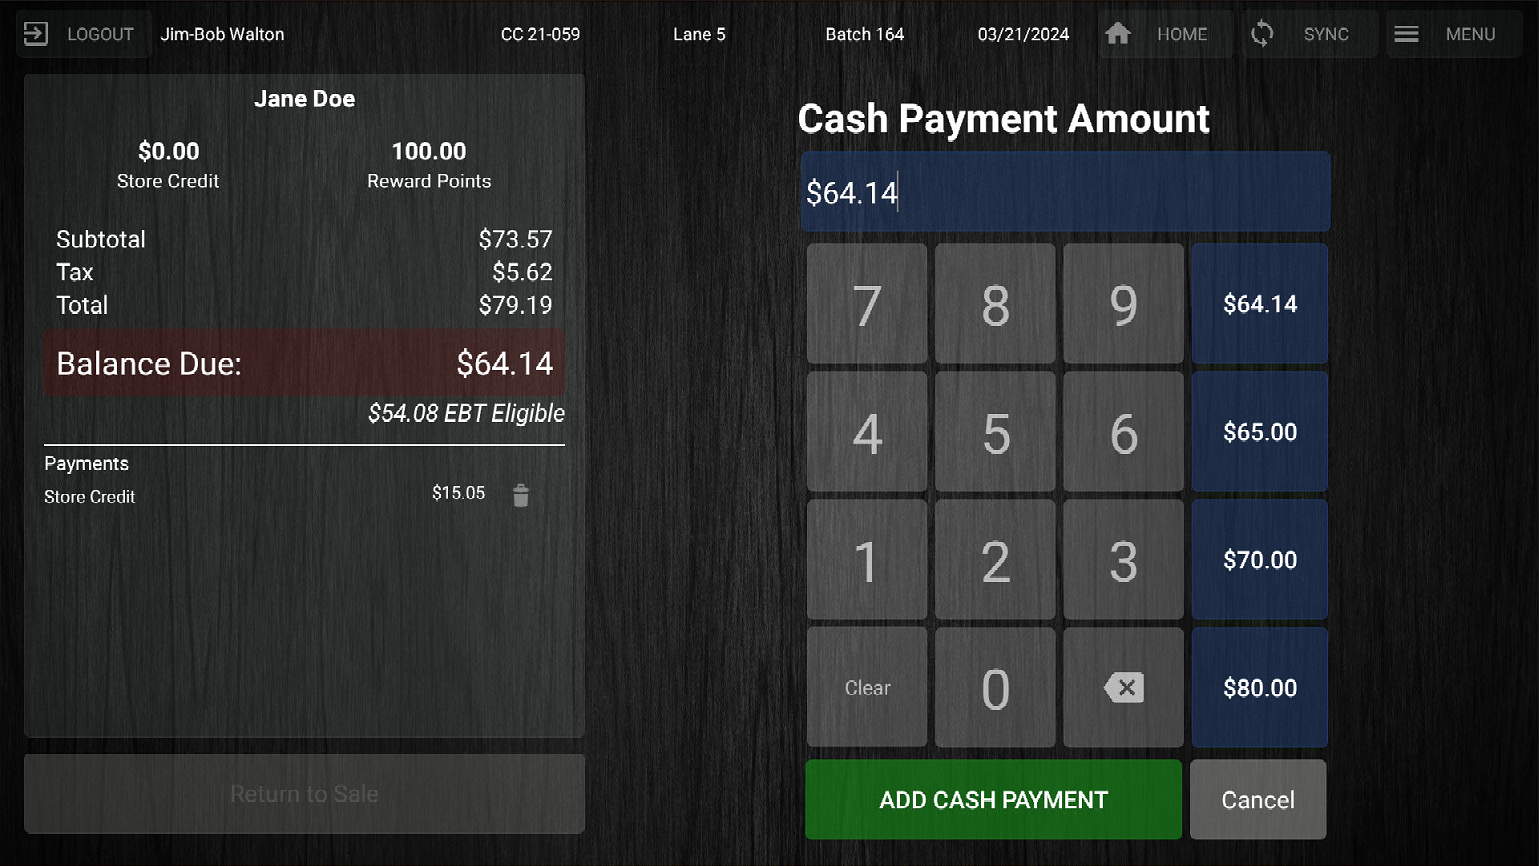
- Select another tender type to pay for the additional product(s).
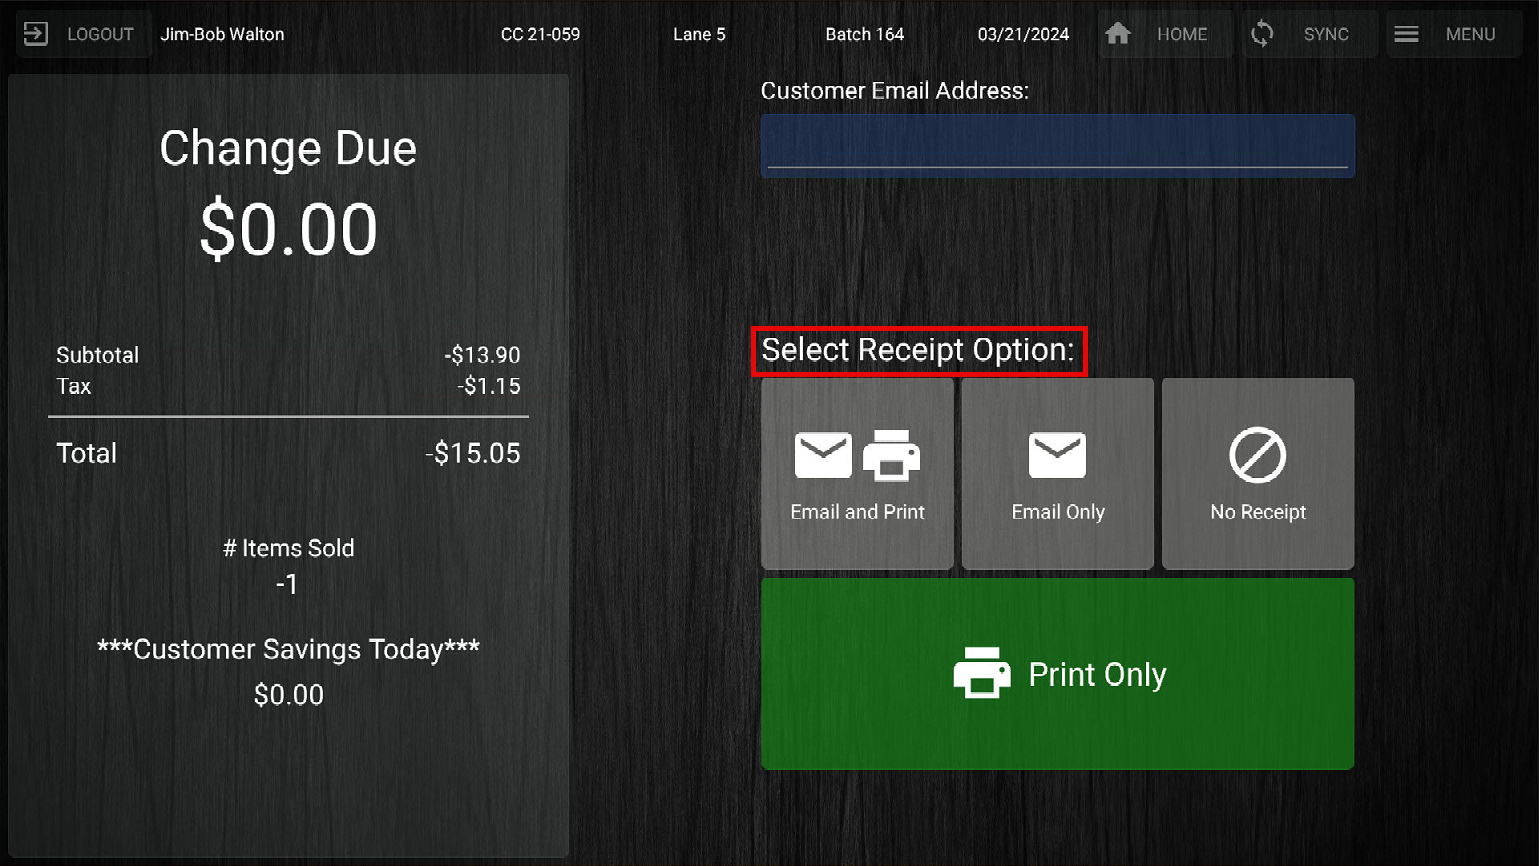
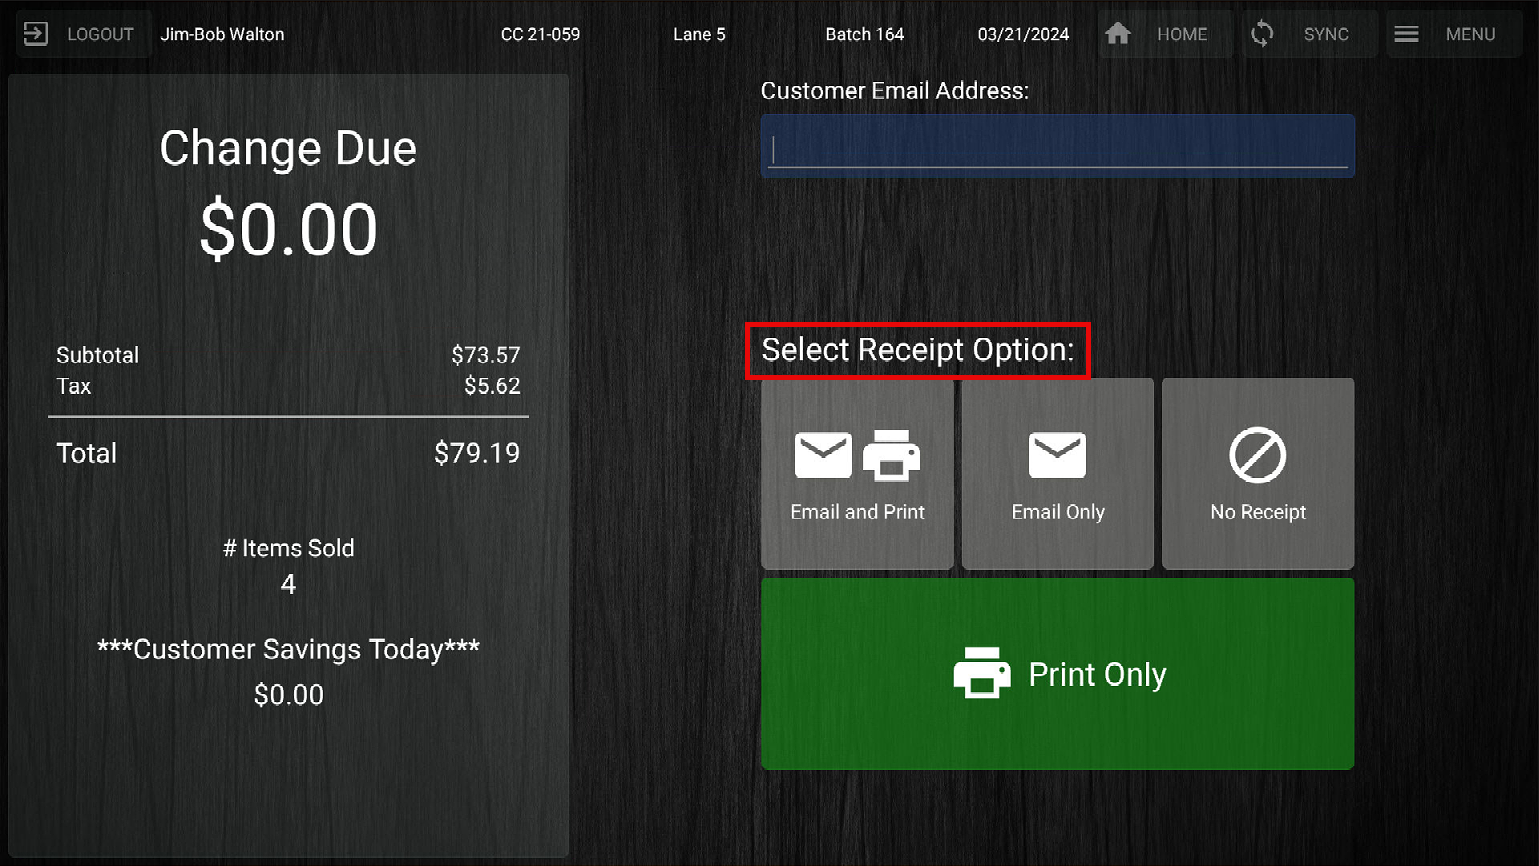
- Once the full balance is paid for, select a receipt option to complete the transaction.
YOU’RE DONE!
There is also a PDF version of this guide attached to this page for your convenience.

McKennan Jones
Comments