Before we can use the mobile scanner, we need to connect it to the internet. Please watch the following video, or read the content below for a step-by-step guide on connecting your mobile scanner to a wireless network.
(There is also a PDF version of this guide attached to this page for your convenience.)
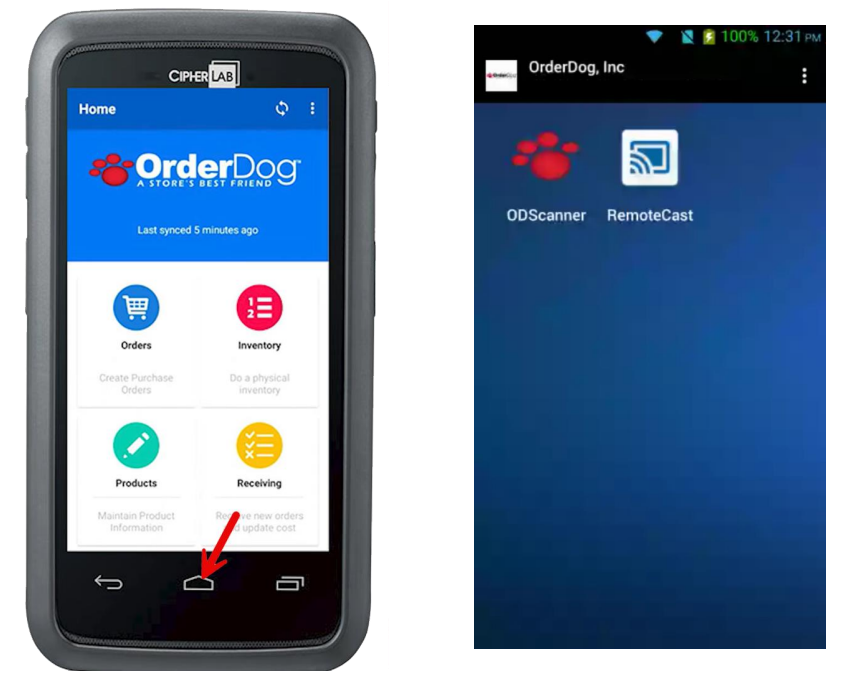
- First, if you are not on the home menu when you turn on the scanner, press the home button found below the scanner screen. You should now be on the home screen.
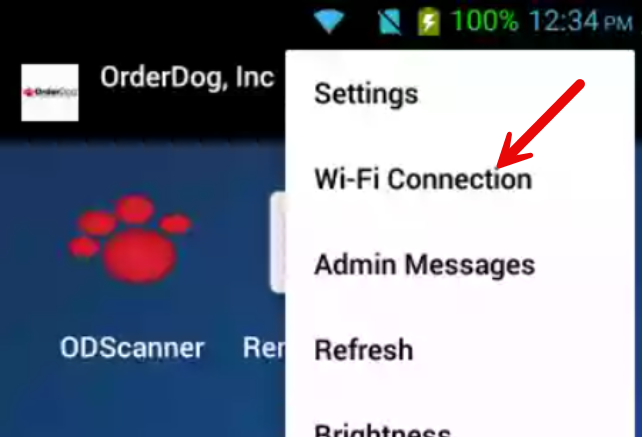
- Tap on the three dots in the top-right corner. Then, tap on “Wi-Fi Connection” in the drop-down menu.
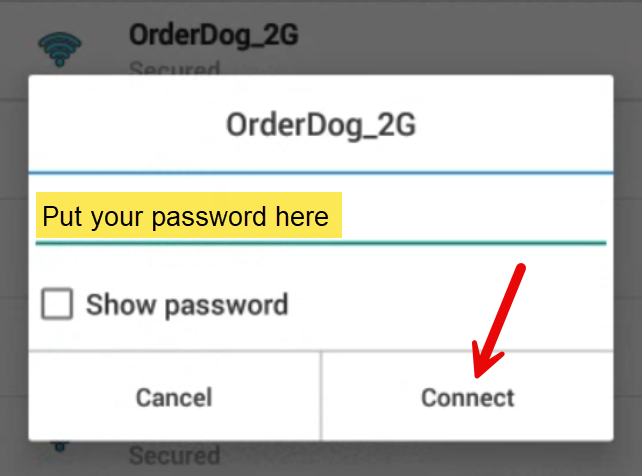
- Find your Wi-Fi in the menu. Enter your password if you have one, and then tap “Connect”.
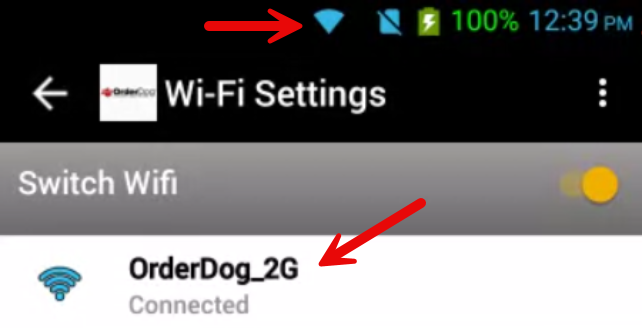
- Your Wi-Fi Connection will now appear at the top of the list and say “Connected” below the name. The Wi-Fi symbol will also appear at the top of the screen showing that the Wi-Fi is connected.
YOU'RE DONE!
If you are still in the process setting up your mobile scanner, you can go back to Step 2.1 - Setting up your Mobile Scanner. If you have already set up your mobile scanner, then you are ready for the next step, which is Step 2.3 - Navigating your Mobile Scanner.
There is also a PDF version of this guide attached to this page for your convenience.
McKennan Jones
Comments